In this article, we will learn about how to print labels in Excel. Labeling is essential in terms of marketing a product, the address of a person to deliver a product, and many more. Microsoft Excel provides us the feature to create labels and preview the labels before we print. We can print labels in Excel with the combination of Microsoft Excel and Microsoft Word. The mail merge feature of Microsoft Word collaborates with Microsoft Excel to print labels in Excel.
How to Print Labels in Excel: With Easy Steps
The total process to print labels in Excel is with the assistance of Microsoft Word is very simple but a little bit lengthy. So, for your convenience to understand easily we will demonstrate this method to you in seven steps.
Step-1: Insert Data in Excel Worksheet for Labels
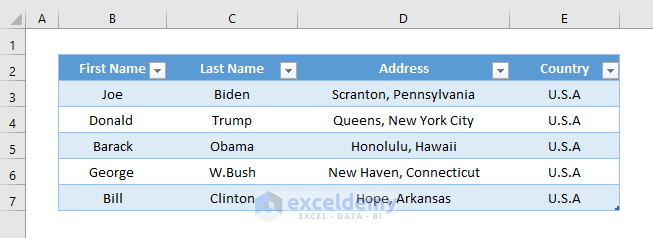
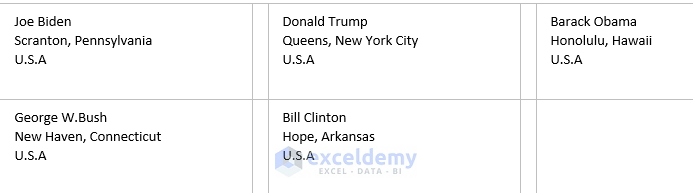
First and foremost, in Step-1 we will data in an Excel worksheet from which we will create labels to print. In the following dataset, we have taken the First Name, Last Name, Address, and Country of five presidents. From this dataset, we will create labels for individual people. Each label will have the First Name, Last Name, Address, and Country of a president.
Step-2: Check the Confirm File Format Conversion Status in Microsoft Word
File format conversion allows us to open any file in any format. To print labels in Excel with Microsoft Word we need to check the confirm file format conversion option. Let’s see how we can do this.
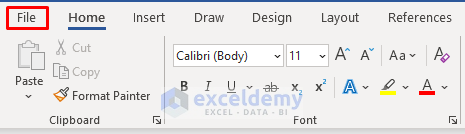
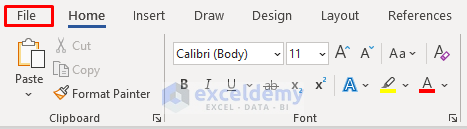
- Firstly, open a new document in Microsoft Word and go to the File tab.
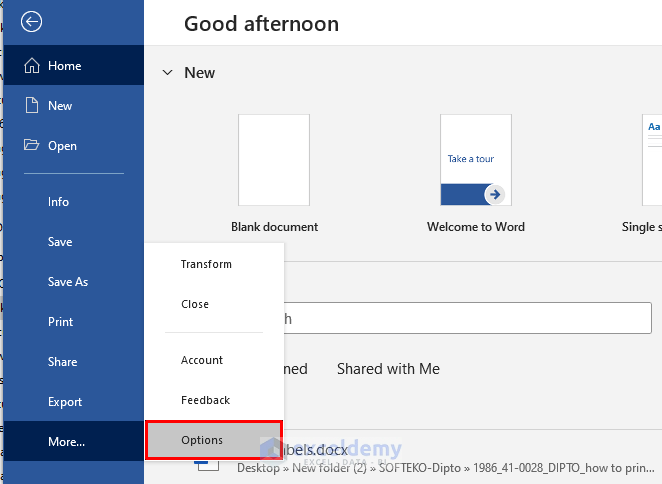
- Secondly, from the File tab select Options.
- A new dialogue box will open.
- Lastly, go to the Advanced Scroll down and check the option Confirm file format conversion on open from the General section.

Step-3: Arrange Labels in Word Document to Print Labels in Excel
In this step, we will arrange labels in Word documents to input values from our Excel worksheet. Let’s see how we can do this.
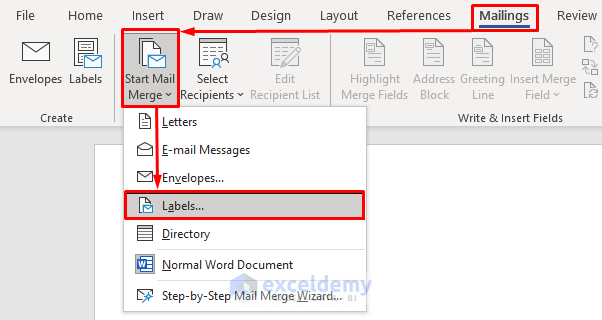
- First, go to the Mailings.
- Next, from the ribbon select Start Mail Merge.
- Then, from the drop-down menu select the option Labels.
- A new dialogue box named “Label Options” will appear.
- From the dialogue box select the options as shown in the figure and press OK.

- So, we will get a new page like the following image.

- After that, to design the appearance of labels go to the Table Design option and select anyone from the available Table Styles.
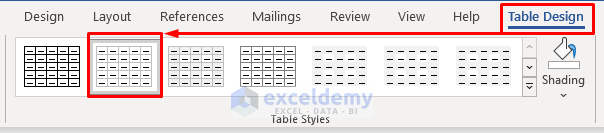
- Finally, we can see a table format on the new page.

Step-4: Import Excel Data in Microsoft Word Document
Now we will input data in the above table from an Excel worksheet. To do this we have to import Excel data in our Microsoft Word document. Just do the following action to import data from an Excel file.
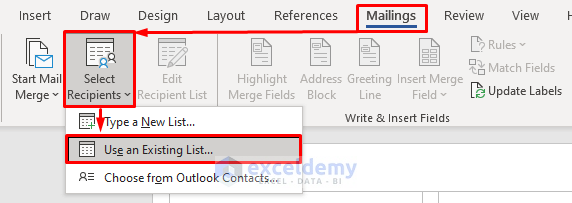
- Firstly, go to the Mailings.
- Secondly, from the ribbon select the option Select Recipients.
- Thirdly, from the drop-down menu select the option Use an Existing List.
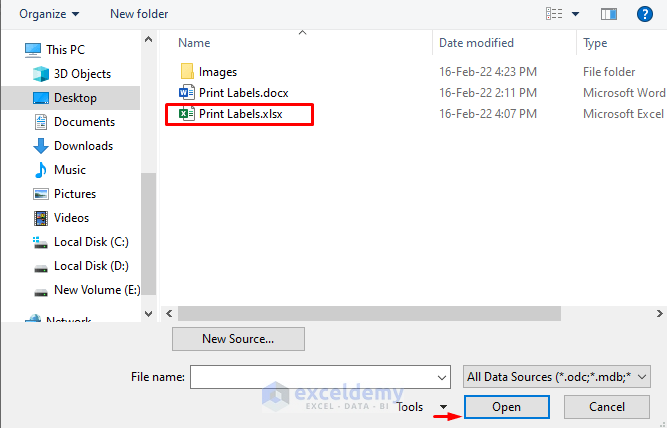
- Fourthly, browse and select the Excel file. Click on “Open” to import data.
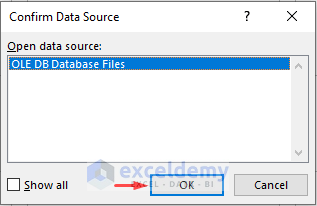
- A new dialogue box named Confirm Data Source will appear.
- Press OK.
- The above command will open one more dialogue box named Select Table.
- Now select the table “Print_Label$” and click on OK.

- Lastly, the above command will give you a table like the following one. It links the Word file with the Excel worksheet.

Step-5: Insert Mail Merge Fields in Microsoft Word
Now we need to add mail merge fields to create labels with our Excel data. We will use input data from the Excel worksheet in the final table of Step-5 to create labels. Let’s see how we can insert mail merge fields.
- In the beginning, select the first label field from the table and go to the Mailings.
- Next, select the option Insert Merge Field.
- Then, from the drop-down click on label First_8Name.
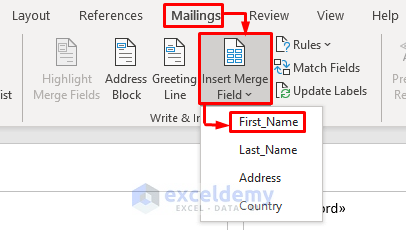
- Now, the field First_Name appears in the first box of the table.
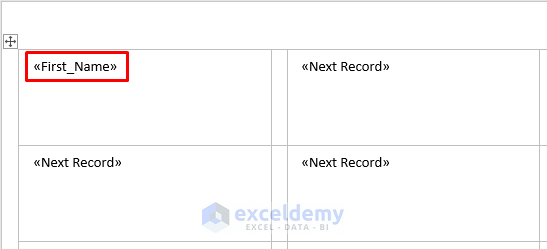
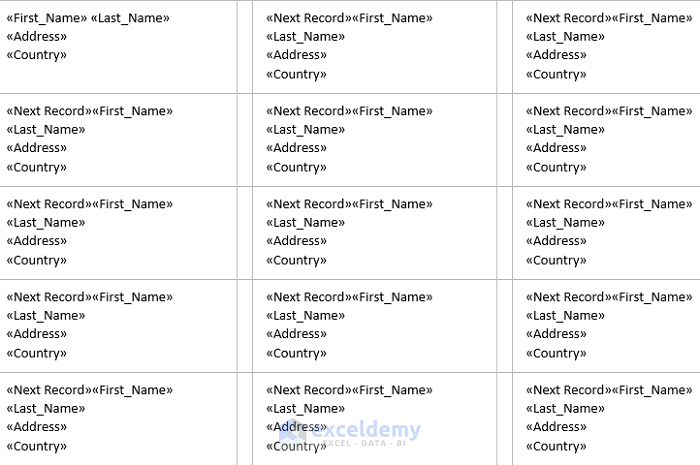
- Like the previous step input all the labels one by one.

- To apply this change in the remaining records of the table select the option Update Labels from the Mailings tab.

- Lastly, we get a page like the following one.
Step-6: Link Word File and Excel Worksheet to Print Labels in Excel
In this step, we will connect our Word file with an Excel worksheet. Let’s see how we can do this:
- Firstly, go to the Mailings tab and select the option “Finish & Merge”.
- From the drop-down, select the option Edit individual Documents.
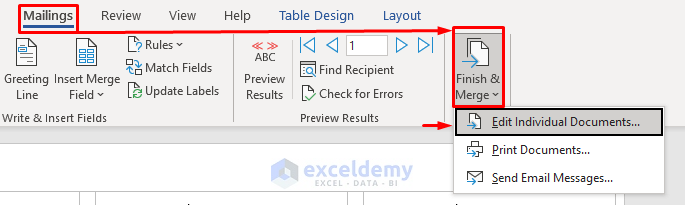
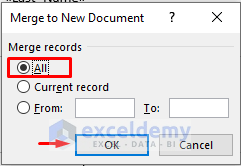
- Secondly, a new pop-up box will appear named “Merge to New Document”.
- Check the box All and click on OK.
- Lastly, a new document for labels will open. We can see that the labels are inserted one by one on the page in the format we wanted.
Step-7: Use Created File to Print Labels in Excel
So, it’s time to print the labels which we created in the previous step.
- First, go to the File tab.
- Next, select the option Print.

- Finally, the label will be printed like the following figure.

Things to Remember to Print Labels in Excel
- After creating the labels don’t forget to save them for future use.
- Blank cells in rows or columns return inappropriate results. So, try to avoid them.
- Use one column at a time for each label. Otherwise, this method will not work.
Download Practice Workbook
You can download the practice workbook from here.
Conclusion
In the end, this tutorial was a complete guide about how to print labels in Excel. Download the practice worksheet that comes with this article to put your skills to the test. If you have any questions, please leave a comment in the box below. We’ll do our best to respond as soon as possible.
Print Labels in Excel: Knowledge Hub
- How to Print Avery Labels from Excel
- How to Print Address Labels in Excel
- How to Print Labels from Excel in Word
- How to Print Avery 5160 Labels from Excel
- How to Print Avery 8160 Labels from Excel
- How to Print Labels in Excel Without Word
<< Go Back To Mailing Labels in Excel | Mail Merge Excel | Learn Excel


Mukesh, thank you for your detailed instructions. I tried several other methods before finding yours and this is the only one that is even close to working for me. I do have one small problem though. My sheet is double spacing the lines, so they do not fit well on my labels. Is this something you’ve come across before? Can you offer an advice on that problem? Thanks in advance.