In this article, we have shown how we can split names in Excel using various methods.
In Excel, you may need to split names, text, or even columns. The main reason for splitting names is that for many official or unofficial works, we need to have different segments of names. The problem arises when we have a huge number of names in front of us. Splitting individual names could be a daunting task for us. Below, we have shown a method where we split the names by column using the TEXTSPLIT function.
How to Use Excel Features to Split Names in Excel
Below is the method, we are going to use some Excel features to split names in Excel.
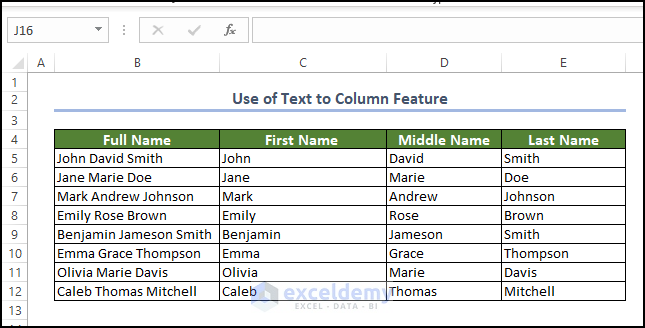
1. Using Text to Columns Feature
Users can use the Text to Column feature to split the cell value into different columns.
For this, the user first copies the text content of range B5:B8. And paste them into cell C8.
- Go to the Data tab > Text to Columns.

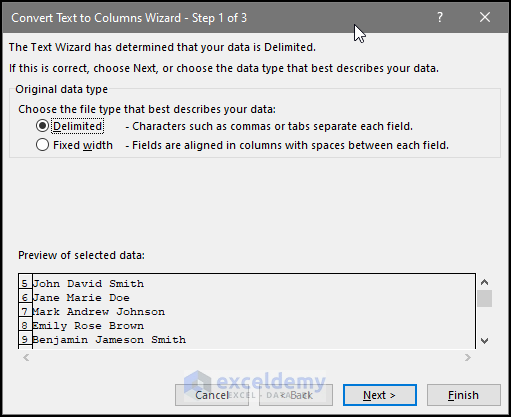
- After that, a new window will appear.
- We will select the Delimited in the Choose the file type that best describes your data: section.
- Click on the Next.
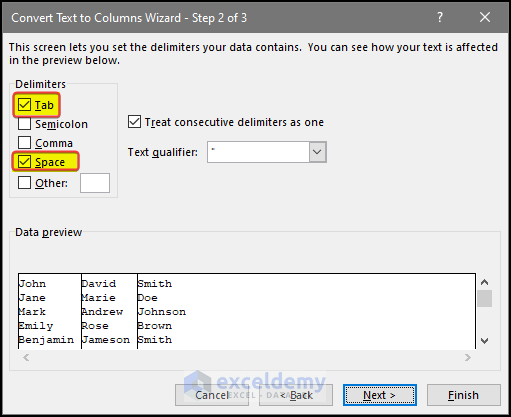
- Then we need to check the box of Space and Tab in the Delimiters section.
- Click on the Next option.
- In this window, we will select the General option in the Column data format.
- Click on the Finish after this.
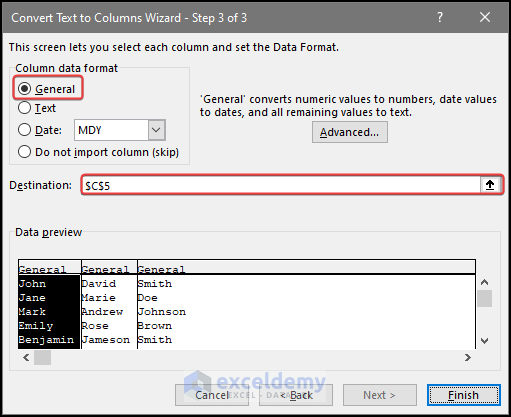
- After this, we will see that the full name is now split into three separate columns.
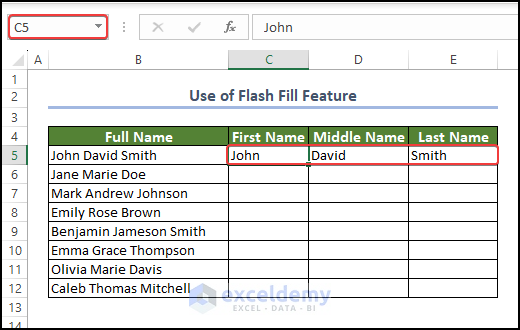
2. Using Flash Fill Feature
In this method, we can use the Flash Fill feature to split cell values into columns.
- We need to fill the columns with cell values in the same format as you want them.
- Meaning the way the user wants to separate the full name into separate columns.
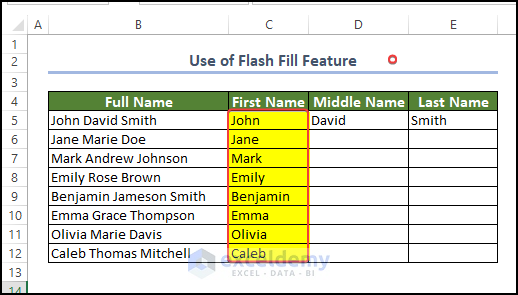
- For example, we have the full name John David Smith in cell B5.
- We need to separate the names into First name, Middle name, and Last name.
- Place the names accordingly in range C5:E5.
- After that, we will hold on to the right mouse button on the corner of cell C5 in the worksheet. We will see that plus icon in the corner.
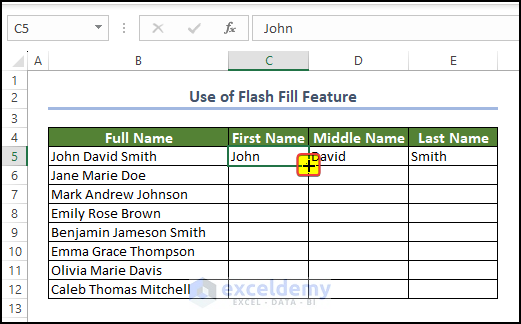
- Then we need to drag that icon to cell C12.
- After dragging the icon to cell C12 release the mouse button.
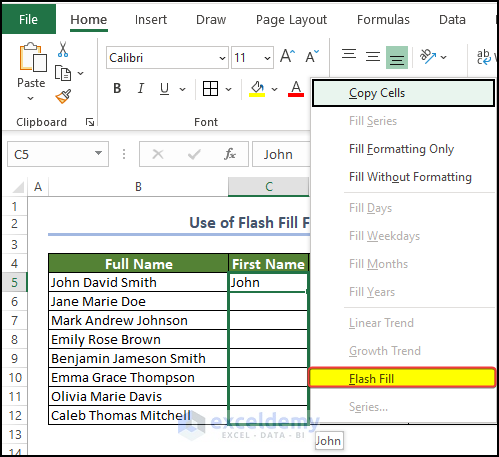
- We can see that there is a context menu.
- In the context menu, click on the Flash Fill option.
- After this, we will see the output with the separated first parts of the names.
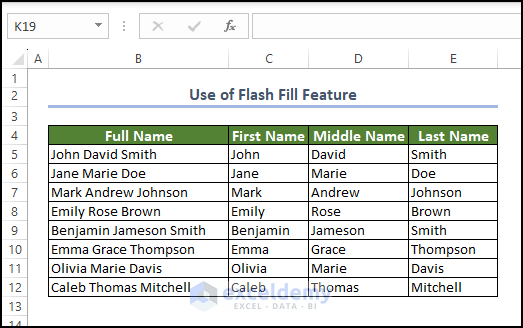
- Repeat the same process for the rest of the columns.
- The final output will look something like the one below.
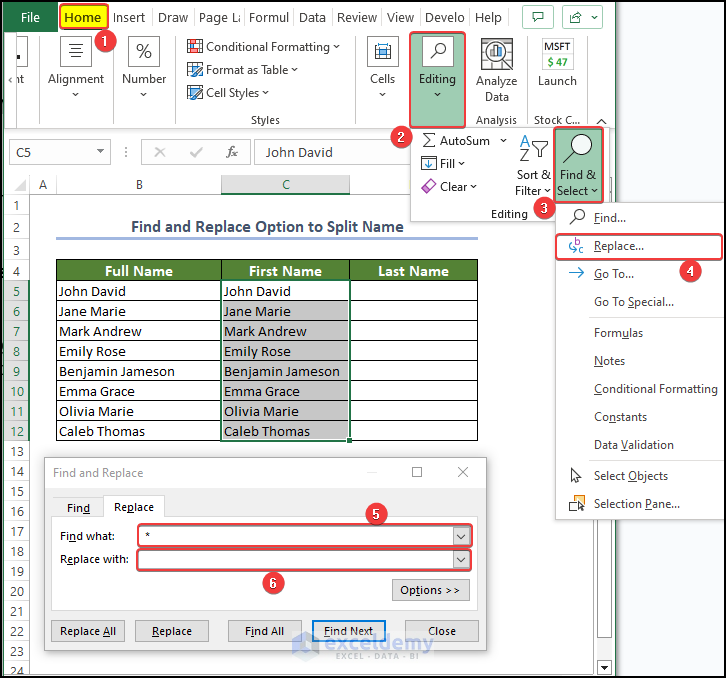
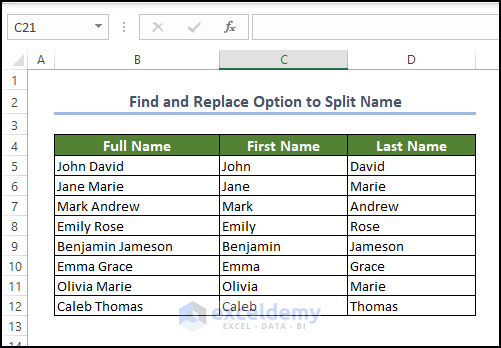
3. Use Find and Replace to Split Names
Using the wildcard feature, users can run Find and Replace with more flexibility.
- Press Ctrl+H to bring up the Find and Replace window.
- Then in the Find what box enter *.
- Place nothing in the Replace with. And then click on Replace All.
- After pressing Replace All, you will notice that the first part of the name is now visible in the range C5:C8.
- And now for the last part of the name, enter Space and an asterisk (*) in the Find what box.
- Enter nothing in the Replace with box.
- Click Replace all after this.
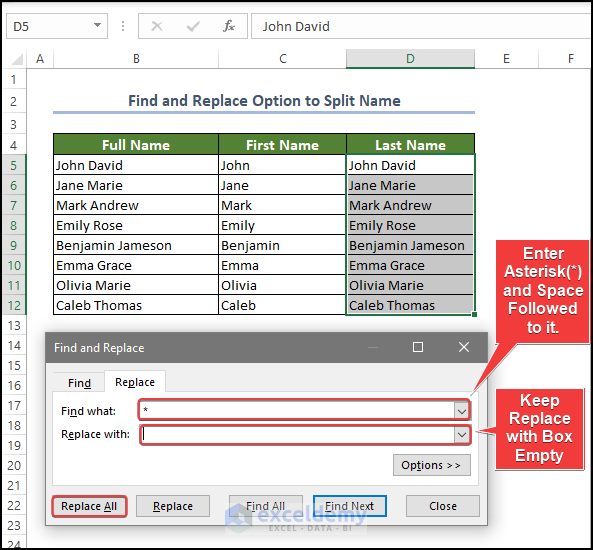
- After pressing Replace All, you will notice that the last part of the name is now visible in the range D5:D8.
How to Use Functions to Split Names in Excel
In the below section, we will use functions like FILTERXML, FIND, LEFT, and RIGHT to split names in Excel.
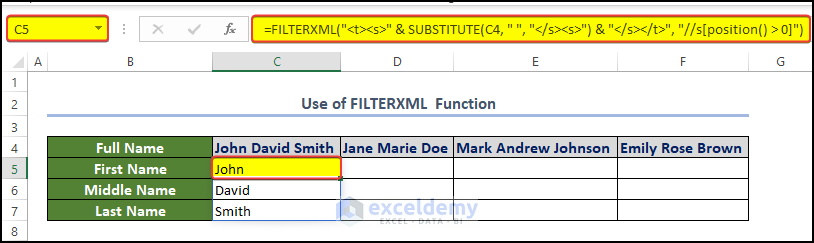
1. Use FILTERXML Function
We can use the FILTERXML function to extract the name segments.
- For this, enter the following formula in cell C5.
=FILTERXML("<t><s>" & SUBSTITUTE(C4, " ", "</s><s>") & "</s></t>", "//s[position() > 0]")- After pressing Enter, we will see that the name segments are now present in the range C5:C7. And this happened by row convention.
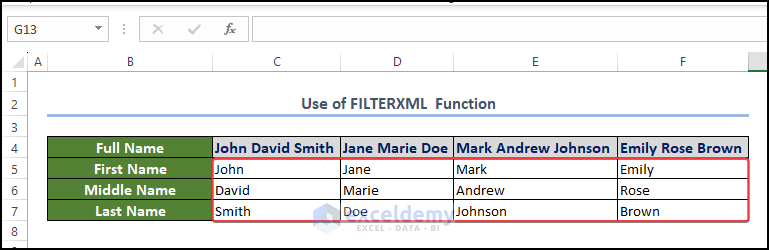
- Drag the Fill Handle from cell C5 to C7.
- After that, we will see that the range C5:F7 has the name segments in the rows.
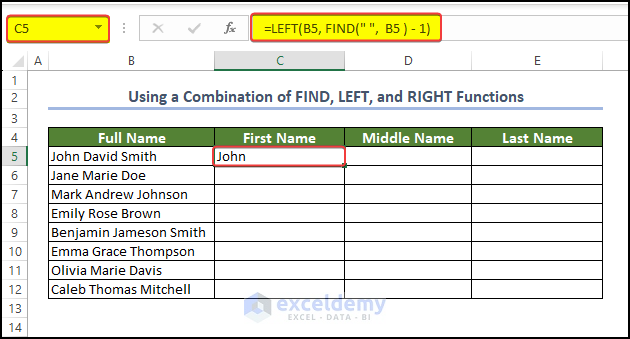
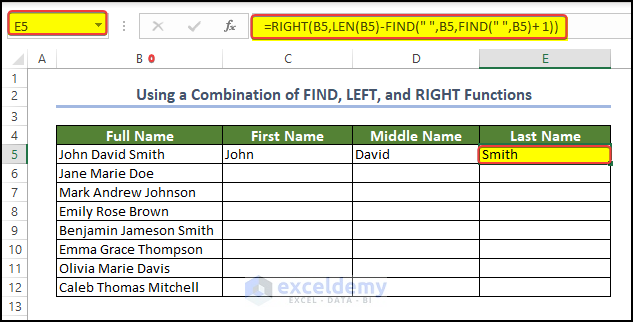
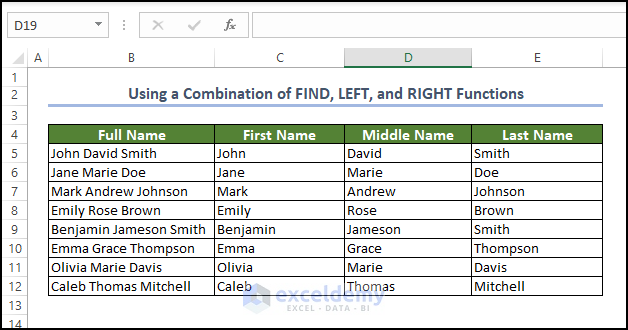
2. Using a Combination of FIND, LEFT, and RIGHT Functions
We can use the combination of the FIND, LEFT, and RIGHT functions to extract different parts of the name.
- For this, enter the following formula in cell C5.
=LEFT(B5, FIND(" ", B5 ) - 1)- After that, we will have the first part of the name in cell C5.
- For this, enter the following formula in cell D5.
=MID(B5, FIND(" ", B5) + 1, FIND(" ", B5, FIND(" ", B5) + 1) - FIND(" ", B5) - 1)- After that, we will have the middle part of the name in cell D5.

- For this, enter the following formula in cell E5.
=RIGHT(B5,LEN(B5)-FIND(" ",B5,FIND(" ",B5)+ 1))- After that, we will have the first part of the name in cell E5.
- Now we can drag the Fill Handle in from cells C5, D5, and E5 to the end of the columns.
- After that, we will see that the range C5:E12 is now filled with the name segments of the full names in the range B5:B12.
How to Use TEXT Functions to Split Names for Excel 365 Users
In addition to the functions mentioned before, we are going to use TEXTSPLIT and TEXT functions to split names. The TEXTSPLIT function is only available in the Office 365 edition.
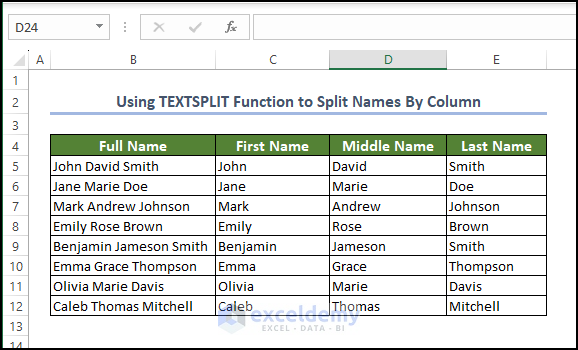
1. Using TEXTSPLIT Function to Split Names By Column
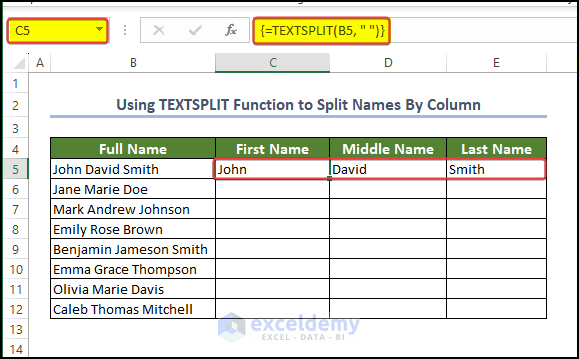
Here, we can use the TEXTSPLIT function to split the text into columns. This means that the name stored in the range B5:B12 is going to be split into columns.
- For this, enter the following formula in cell C5.
=TEXTSPLIT(B5," ")- Right after you enter the formula and press Enter, you will see that the three name segments are present in the range C5:E5.

- Drag the Fill Handle to cell C12.
- After that, you can see that all the names stored in the range C5:C12 are now separated into three separate columns.
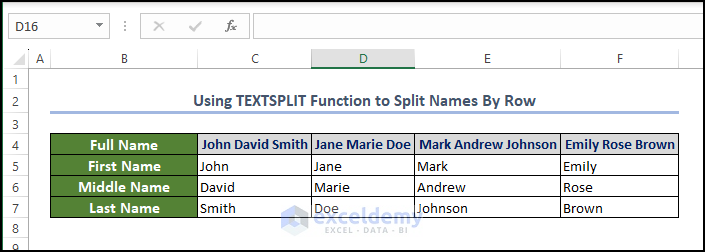
2. Using TEXTSPLIT Function to Split Names By Row
Here, we can use the TEXTSPLIT function to split the text into rows. This means that the name stored in the range B5:B12 is going to be split into rows.
- For this, enter the following formula in cell C5.
=TEXTSPLIT(C4, " ")- Right after you enter the formula and press Enter, you will see that the three name segments are present in the range C5:C7.

- Drag the Fill Handle to cell F5.
- We can see that the range C5:F7 is filled with the name segments.
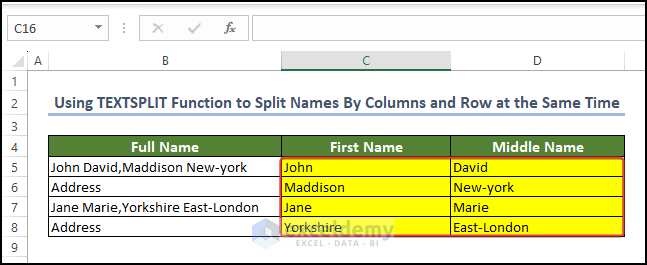
3. Using TEXTSPLIT Function to Split Names By Columns and Row at the Same Time
We can use the TEXTSPLIT function to split a text into columns and rows. This means that the name stored in the range B5:B12 is going to be split into rows and columns.
- To split the name by rows, enter the following formula in cell C5.
=TEXTSPLIT(B5, " ",",")- After pressing Enter, we will see that the text in cell B5 is split into both rows and columns.
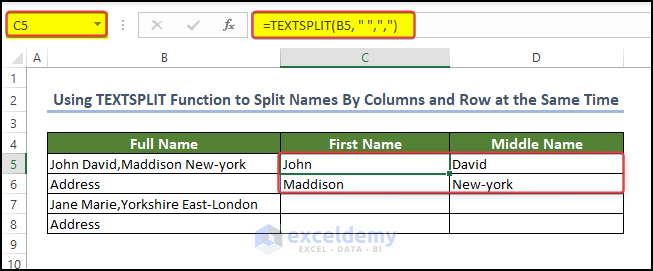
- Repeating the same process in cell B7, we will get the same result in the range C7:D8.
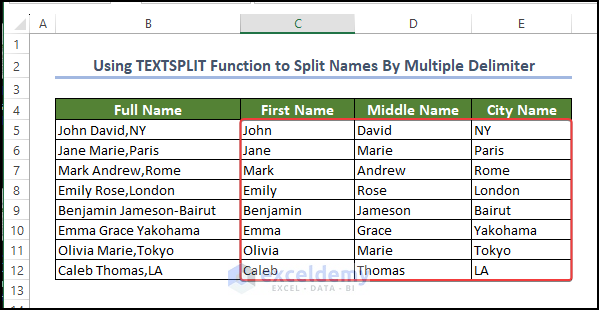
4. Using TEXTSPLIT Function to Split Names By Multiple Delimiter
We can use the TEXTSPLIT function to split text with multiple delimiters. The delimiters need to be placed delicately inside the function. We have a text string with diverse delimiters in the range B5:B12.
- For this, we need to enter the following formula in cell C5.
=TEXTSPLIT(B5, {" ",",","-"})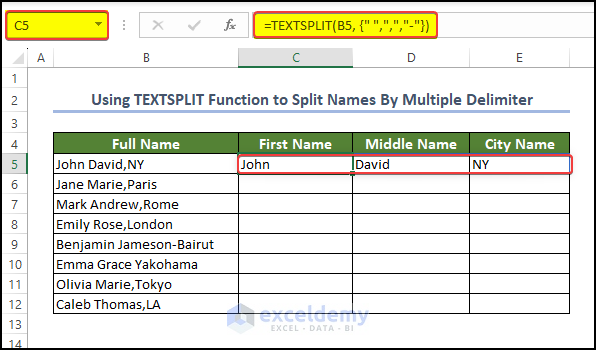
- Drag the Fill handle to cell C12.
- After that, we will see that the range C5:E12 is now filled with name segments.
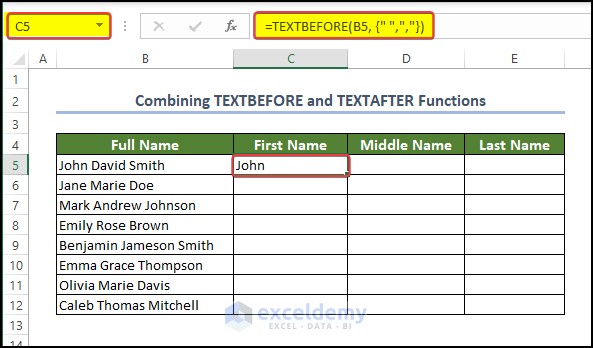
5. Combining TEXTBEFORE and TEXTAFTER Functions
We can use a combination of the TEXTBEFORE and TEXTAFTER functions to extract name segments in Excel.
- For this, enter the following formula in cell C5.
=TEXTBEFORE(B5, {" ",","})- After pressing Enter, we will see that the first part of the name is now showing in cell C5.
- To extract the middle part of the name, we can enter the following formula in cell D5.
=TEXTBEFORE(TEXTAFTER(B5, " ")," ")
- To extract the middle part of the name, we can enter the following formula in cell D5.
=TEXTAFTER(B5, " ",2)
- Now we can see that all segments of the name are present in the range C5:E5.
- We can drag all the fill handles to the end of the dataset.
- We can see that the names stored in the range B5:B12 are separated in the range C5:E5.
How to Use Power Query to Split Names in Excel
Using the power query, we can split text in Excel proficiently.
In the below method, we are going to use Power Query to split columns in the Excel worksheet.
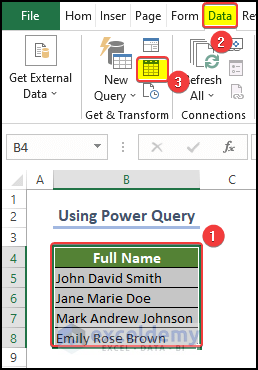
- Select the range B4:B8.
- Go to the Data tab > Get and Transform Data group > From Table/Range.
- We will see a Power Query window, where we can see that the table that we chose previously is now present.
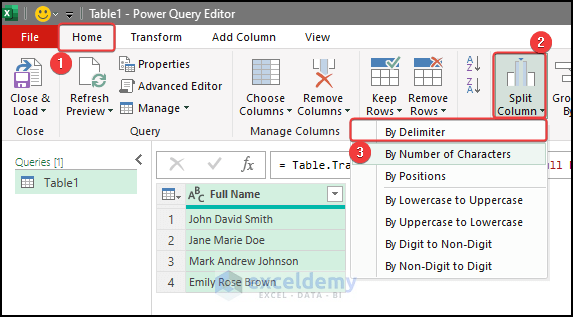
- Go to the Home tab and click on the Split Column option.
- After clicking on the Split Column option, the user can see a drop-down option.
- In the drop-down option, select the Delimiter option.
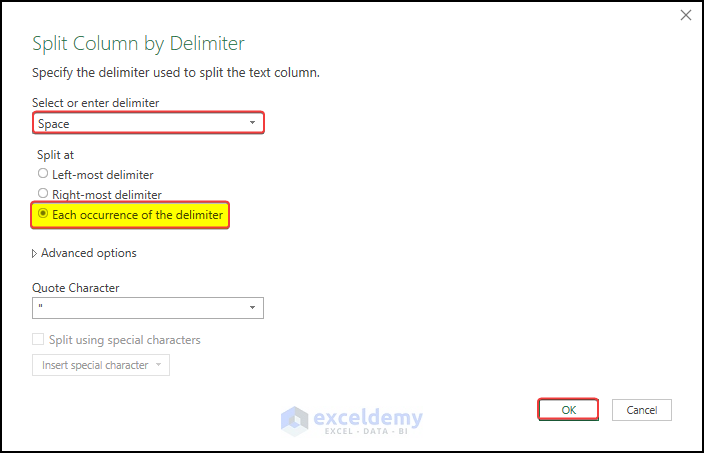
- After selecting the Delimiter option, we can see that there is a window named Split Column by Delimiter.
- In this window, choose the Space as Delimiter from the Select or enter delimiter section.
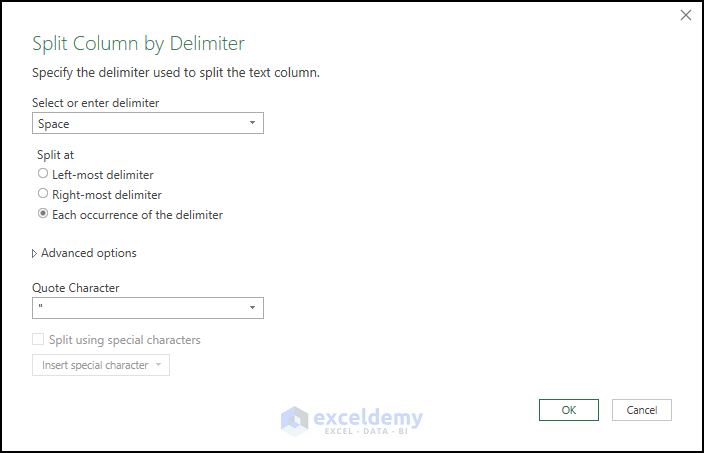
- After that, select Each occurrence of the delimiter on the Split at section.
- The rest of the options should stay unchanged.
- Click OK after this.
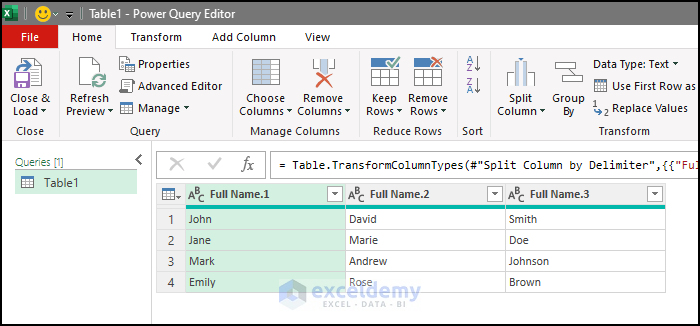
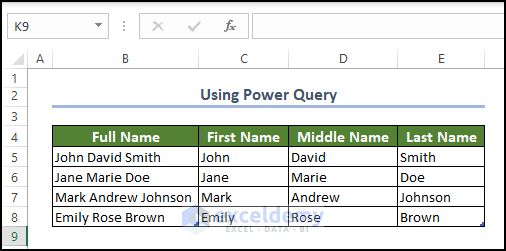
- We will see the names are now split into three different parts in the power query editor.
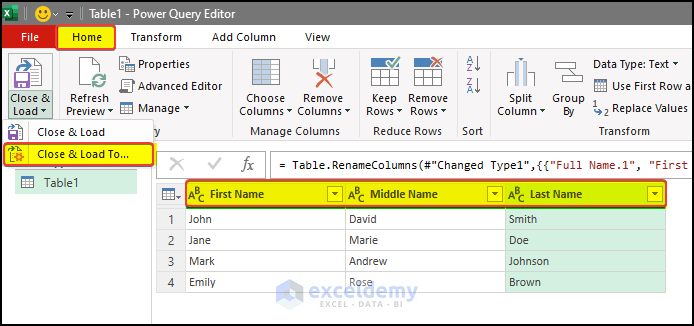
- Now we need to load this table back into the worksheet. But first, we need to update the table header names.
- Change the table header as shown in the image below.
- Go to the Home tab > Close & Load to > Close & Load To…
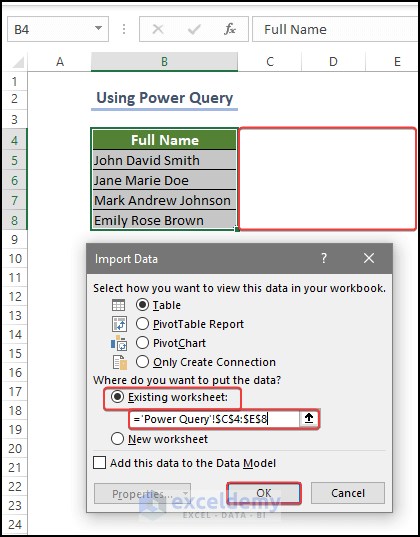
- Switch to the worksheet, and see the Import Data window.
- In the window, we will select Table in the Select how you want to view this data in the workbook.
- Then select Existing worksheet in the Where do you want to put your data?
- Set the range to C4:E8.
- Click OK after this.
- After loading the sheet into the worksheet, we can see that the table is now present in the worksheet. The name is now split into three separate parts.
How to Use VBA Macro to Split Column in Excel
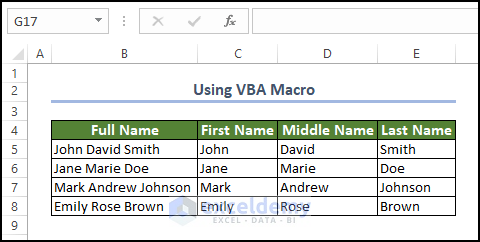
We can use VBA macro to split a column value into different columns.
We have the full names of the people in the range B5:B8.
- For this, we first need to initiate the code editor following the helper article given here.
- In the code editor, enter the following code.
Sub SplitNames()
Dim rng As Range
Dim cell As Range
Dim delimiter As String
Dim splitValues() As String
Dim numColumns As Integer
Dim i As Integer
Dim newColumn As Range
Set rng = Range("B5:B8")
delimiter = " "
numColumns = 1
For Each cell In rng
splitValues = Split(cell.Value, delimiter)
If UBound(splitValues) + 1 > numColumns Then
numColumns = UBound(splitValues) + 1
End If
Next cell
rng.Offset(0, 1).Resize(, numColumns - 1).Insert Shift:=xlToRight
For Each cell In rng
splitValues = Split(cell.Value, delimiter)
Set newColumn = cell.Offset(0, 1).Resize(, numColumns)
For i = 0 To UBound(splitValues)
newColumn.Cells(1, i + 1).Value = splitValues(i)
Next i
Next cell
End Sub- After entering the code, press Enter.

- The user will notice that the full name in the range B5:B8 is already split into three separate columns.
VBA Code Breakdown
Sub SplitColumn():
- This line starts the declaration of a subroutine called “SplitColumn”.
Dim rng As Range:
- Declares a variable named “rng” of type Range. This variable will be used to store a range of cells.
Dim cell As Range:
- Declares a variable named “cell” of type Range. This variable will be used to iterate through each cell in the range.
Dim delimiter As String:
- Declares a variable named “delimiter” of type String. This variable will store the delimiter used to split the cell values.
Dim splitValues() As String:
- Declares a dynamic array named “splitValues” that will store the values obtained after splitting a cell’s value.
Dim numColumns As Integer:
- Declares a variable named “numColumns” of type Integer. This variable will store the number of columns needed to accommodate the split values.
Dim i As Integer:
- Declares a variable named “i” of type Integer. This variable will be used as a loop counter.
Dim newColumn As Range:
- Declares a variable named “newColumn” of type Range. This variable will store the range of cells where the split values will be placed.
Set rng = Range(“B5:B8”):
- Sets the “rng” variable to represent the range B5:B8.
delimiter = ” “:
- Sets the “delimiter” variable to a space character, indicating that the cell values will be split based on spaces.
numColumns = 1:
- Sets the initial value of “numColumns” to 1.
For Each cell In rng:
- Starts a loop that iterates through each cell in the range represented by “rng”.
splitValues = Split(cell.Value, delimiter):
- Splits the value of the current cell using the specified delimiter and stores the resulting values in the “splitValues” array.
If UBound(splitValues) + 1 > numColumns Then:
- Checks if the number of split values is greater than the current value of “numColumns”.
numColumns = UBound(splitValues) + 1:
- If the number of split values is greater, update the value of “numColumns” to the new maximum.
Next cell:
- Ends the loop and proceeds to the next cell in the range.
rng.Offset(0, 1).Resize(, numColumns – 1).Insert Shift:=xlToRight:
- Inserts a new range of cells to the right of the original range, with the number of columns equal to “numColumns – 1”.
For Each cell In rng:
- Starts a new loop to iterate through each cell in the original range.
splitValues = Split(cell.Value, delimiter):
- Splits the value of the current cell using the specified delimiter and stores the resulting values in the “splitValues” array.
Set newColumn = cell.Offset(0, 1).Resize(, numColumns):
- Sets the “newColumn” variable to represent the range of cells starting from the cell one column to the right of the current cell, with a width equal to “numColumns.”
For i = 0 To UBound(splitValues):
- Starts a loop that iterates through each element in the “splitValues” array.
newColumn.Cells(1, i + 1).Value = splitValues(i):
- Assign the i-th value from the “splitValues” array to the corresponding cell in the “newColumn” range.
Next i:
- Ends the loop and proceeds to the next element in the “splitValues” array.
Next cell:
- Ends the loop and proceeds to the next cell in the range.
End Sub:
- Marks the end of the subroutine “SplitColumn.”
Things to Remember
Consistent Format: Ensure that all the names you’re working with are in a consistent format. For example, if some names are in the First, Last format and others are in the Last, First format, you may need to standardize them before splitting.
Leading and Trailing Spaces: Check for any leading or trailing spaces in the name column. Extra spaces can cause issues while splitting. You can use the TRIM function in Excel to remove leading and trailing spaces.
Middle Names or Initials: Determine whether you want to include middle names or initials in the split. If you want to keep them intact, make sure to account for them in your splitting method.
Comma or Space: Identify the delimiter you want to use for splitting the names. Common delimiters are commas (“,”) or spaces (” “). If your names are in Last, First format, you can split them using the comma. For other formats, consider using spaces as the delimiter.
Formulas or Text to Columns: Choose the appropriate method for splitting. You can use Excel’s built-in Text to Columns feature, found under the Data tab, or use formulas like LEFT, RIGHT, MID, or FIND to extract the first and last names.
Testing and Validation: After splitting the names, verify the results to ensure accuracy. Check a sample of records manually to make sure the splitting has been performed correctly.
Frequently Asked Questions
1. How do I split comma-separated names in Excel?
You can follow the first method, where we used the Text to Column feature to split names in Excel. Now, in the choice of delimiter option, you must select the comma, and then press the Next option.
2. How do I separate alphanumeric in Excel?
You can use the following modified formula used in the previous method here in the article, particularly in the combination of the function method.
=LEFT(A1, MIN(FIND({0,1,2,3,4,5,6,7,8,9},A1&"0123456789"))-1)3. How to split cells in Excel?
Similar to the Text to Column method, we can use the below method to split cells. The method is similar to that method.
To split cells in Excel, select the cells you want to split, go to the Data tab, click on Text to Columns, choose the appropriate option (Delimited or Fixed Width), specify the delimiter or set column break lines, select the data format, and click Finish.
Conclusion
In this article, we have basically seen how we can split names in Excel using various methods. Among those methods, the one that incorporates the Text to Column feature and Flash Fill is the most useful. Also, users can use the VBA method or the power query if they have a large dataset.
Although the formulas can be a bit clunky, they can be a useful tool to extract the different parts of the names.

