In this article, we will go over how you can set up a print area in Excel. The print area determines how your content looks when printed.
Clicking on the Print button automatically selects the entire worksheet to print. It does not allow for much customization. But, Excel offers some useful features that you can use to define your print area easily.
You can adjust the print area and also clear it according to your need. Print area in Excel is a useful tool that allows you to print important areas of your document.
Download Practice Workbook
You can practice on your own by downloading the free Excel worksheet.
How to Set Print Area in Excel
You can set a print area in Excel in different ways. The methods are described below.
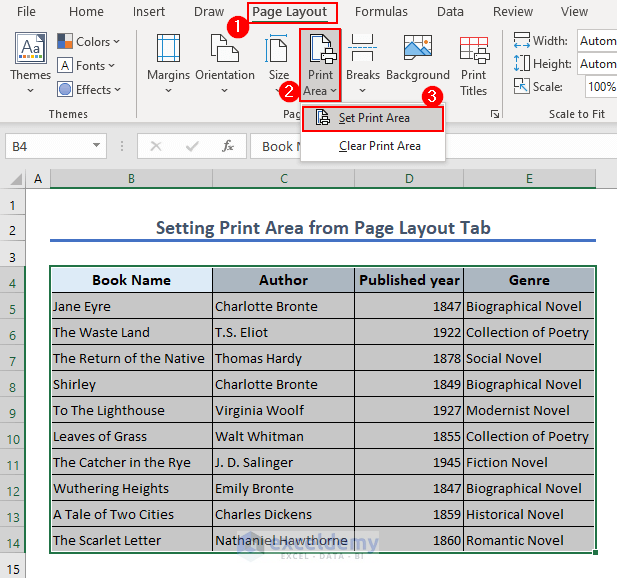
1. Setting Print Area from Page Layout Tab
- Select the area you want to set as print area and go to Page Layout > Print Area > Set Print Area.
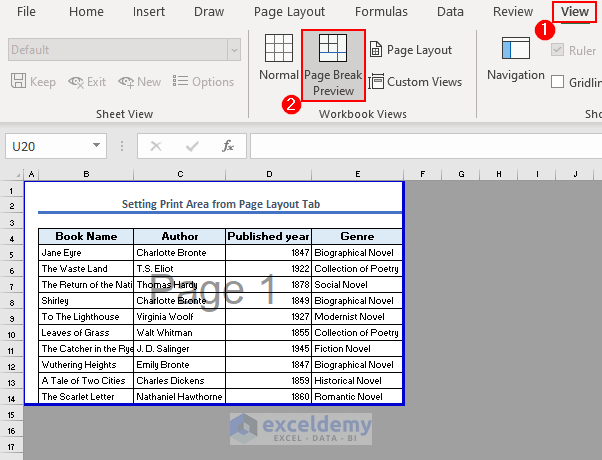
- Your print area is set. Go to View tab > Page Break Preview to see the print area.
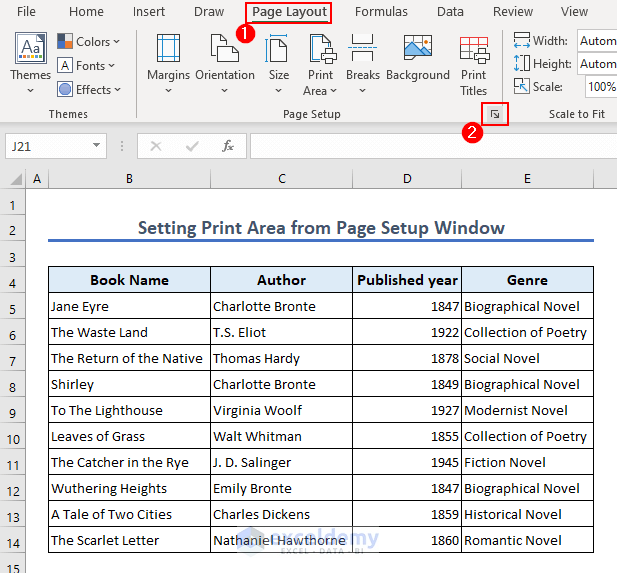
2. Setting Print Area from Page Setup Window
- Go to Page Layout > Page Setup.
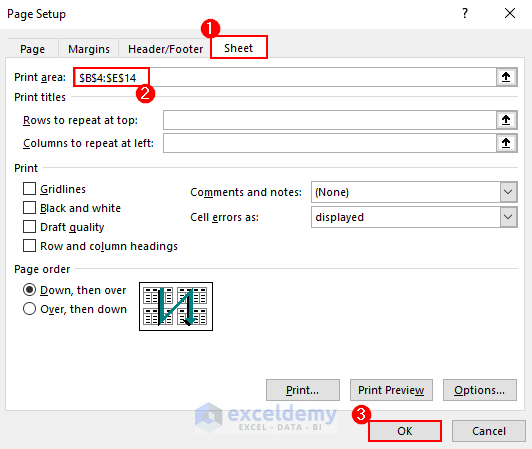
- Go to the Sheet tab in the popup window.
- Assign the desired range in the Print area box.
- Close the dialogue box by clicking on OK. Your print area is now set.
3. Set Multiple Print Areas
3.1 From Page Layout Tab
- Select the different ranges by pressing Ctrl and go to Page Layout > Print Area > Set Print Area.

- The multiple print areas are now set. These areas will print on different pages while printing.
3.2 From Page Setup Window
You can also set multiple print areas from the page setup window.
- Go to Page Layout > Page Setup > Sheet.
- Assign the desired range in the Print area box.
- Continue adding multiple areas after commas to set multiple print areas.

- The multiple print areas are now set. These areas will print on different pages while printing.
Read More: How to Set Print Area for Multiple Pages in Excel
How to Modify Print Area
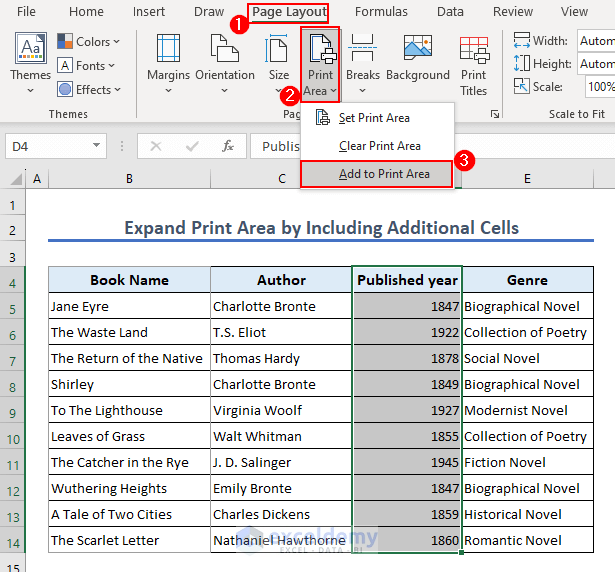
1. Expand Print Area by Including Additional Cells
After adding a print area, you can add cells or a range to that print area to expand the selected area.
- Select the area you want to add and go to Page Layout > Print Area > Add to Print Area.
2. Modify Print Area from Page Setup Window
- Go to Page Layout > Page Setup > Sheet.
- Assign the desired range in the Print area Continue adding areas after commas to add to the existing print area.
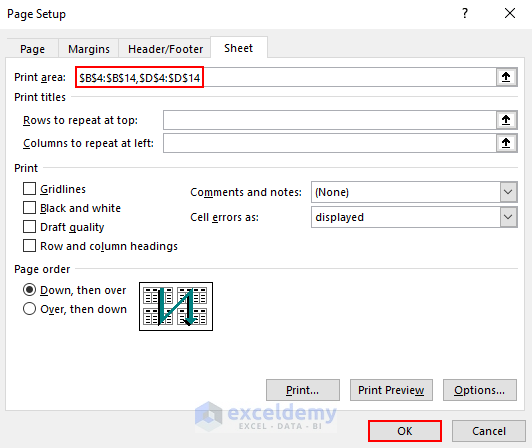
- If you select contiguous ranges separately, they will still consider them as a single area.
- If you select non-contiguous ranges, they will consider them as multiple areas.
How to Print Multiple Areas on Single Page
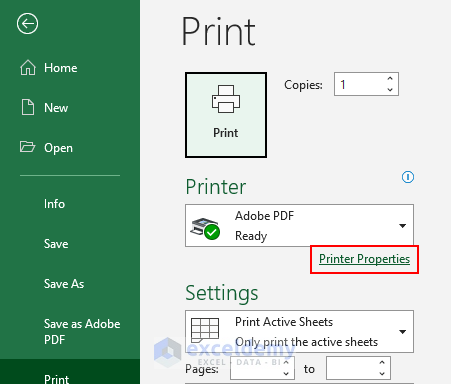
Excel does not allow printing multiple areas on a single page. This is a feature of the printer. But not every printer possesses this feature. If your printer has this feature, you will be able to print multiple areas on a single page. You can check this by pressing Ctrl+P and exploring the Printer Properties menu.
However, if your printer does not have this option, then you can use the Paste Special feature and print multiple areas on a single page.
- Select the desired print area and copy it.
- Open a new sheet and right click on any blank cell and go to Paste Special > Linked Picture.
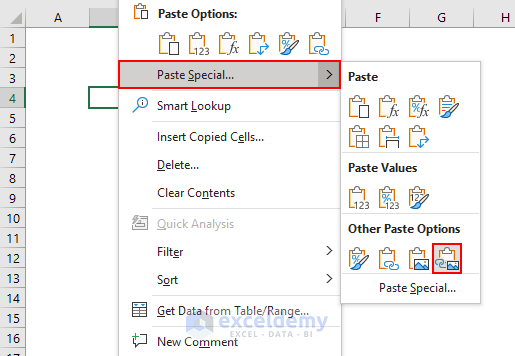
- Repeat these steps for other print areas.
- To print all the copied print areas together on a single page, use the keyboard shortcut Ctrl+P.
Read More: How to Print Selected Area in Excel on One Page
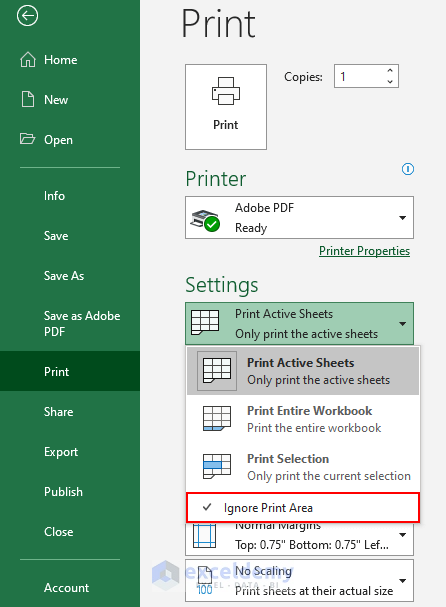
How to Ignore Print Area
To ignore printing print area,
- Press Ctrl+P and tick on Ignore print area in the settings menu. This will ignore the print area from printing.
How to Clear Print Area
- Go to Page Layout > Print Area > Clear Print Area.
- This will clear all the print areas from the worksheet.

Read More: How to Delete Extra Pages in Excel
How to Adjust Page Breaks in Excel
Excel sets up page breaks automatically based on different settings. But you can easily adjust page breaks for printing.
- Go to View tab> Page Break Preview.
- In Excel, a dark blue border indicates Page breaks. Drag this border to adjust page breaks according to your liking.
Common User Problems While Printing Area in Excel
1. Improper Print Area
Problem: You are trying to select a print area but the print area you selected is not shown.
Solution: Clear the Print Area completely before trying to add one.
2. Only some of the columns are printed
Problem: You have selected some columns for printing, but the printout has missed out on some of the selected columns.
Solution: This may be because all the columns do not fit on one page. Try to make the margins narrow or adjust the scaling.
3. Print Area is Greyed Out
Problem: You are trying to set a print area but the print area is grey.
Solution: This may be due to the grouping of sheets. Try to ungroup sheets by right-clicking on any of the sheets’ names and selecting Ungroup Sheets.
Things to Remember
- Selecting contiguous cells or ranges will be considered a single area by Excel.
- Make sure to select the ranges properly before selecting them as print areas.
Conclusion
The print area is important to accurately print Excel documents. Not setting a print area will result in printing the whole worksheet by default. Set print areas to print only the necessary parts of the documents. Follow this article for your answers regarding the print area in Excel and use the solutions in your work or personal life.
Frequently Asked Questions
1. Can I change the print area in Excel?
A: Yes, it is quite easy to change a print area in Excel. We have discussed this in this article.
2. Is there any keyboard shortcut to set the print area?
A: Press Alt+P+R+S on the keyboard by selecting the range to set that range as the print area.
3. Can I set different print areas for different worksheets within the same workbook?
A: Yes, You can set separate print areas for different worksheets in the same workbook.
Print Area in Excel: Knowledge Hub
<< Go Back to Page Setup | Print in Excel | Learn Excel

