In this article, we will discuss the print preview in Excel and understand their significance. In various professional fields such as business, commerce, administration, and education, knowing how to use print preview features in Excel is essential. It enables us to present our data in a well-organized and efficient manner, ensuring accurate printing of our documents and records.
Print previews play a vital role in documentation, record-keeping, joint ventures, collaboration, and review processes. Particularly, it is highly recommended that individuals understand how to format data in print preview to enhance professionalism and facilitate better understanding and workflow.
How to Use Print Preview in Excel
There are some differences in the process of using Print Preview between the newer
versions and earlier versions of Excel.
1. Print Preview in Newer Versions (Excel 2013 and Later)
In newer versions of Excel, the print preview is quite easy to use, and it offers a better user interface. We will use the following dataset as a workbook to demonstrate the process of using print preview in Excel.
First, open the workbook or worksheet, then select the data range (i.e., cell B2:H64).
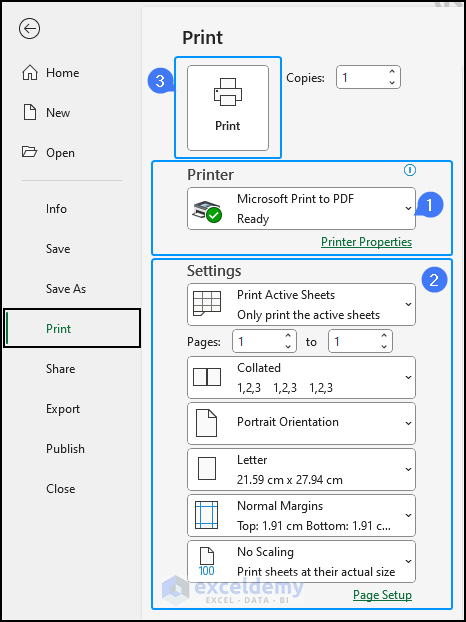
Now go to the File Tab > Select Print from the menu, or you can directly use keyboard shortcuts CTRL+P.
On the right side, you will find the Preview Pane and, on the left, you will find the Print Settings menu.
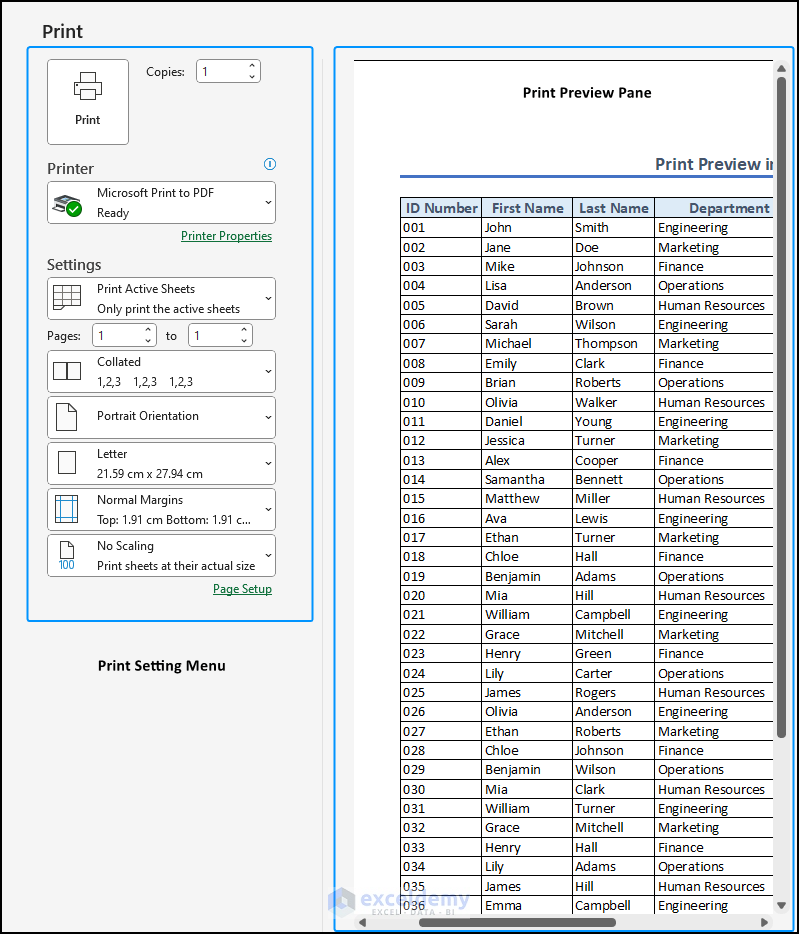
Click here to enlarge the image.
Next, select the printer you want to use for printing (i.e., Microsoft Print to PDF).
Choose your desired settings from the settings menu, such as page orientation, paper size, or margins.
Finally, click on the print option at the top to start the printing process.
2. Previous Versions (Excel 2007 and Earlier)
The printing process is much or less the same as in newer versions. First, open the workbook or worksheet and select the data range.
Then, click on the “Office” Windows Button located at the top left corner.
From the drop-down menu, select the Print option. You can also use CTRL+P as a keyboard shortcut to directly jump to the print option.
The rest of the process is like the newer versions of Excel. Check out the following section to understand how to use the Settings option to get the best print preview for your dataset in Excel.
How to Use Print Settings to Finalize the Print Preview in Excel
The print settings menu provides six features to customize the printing page. You can also look at the changes in the print preview pane.
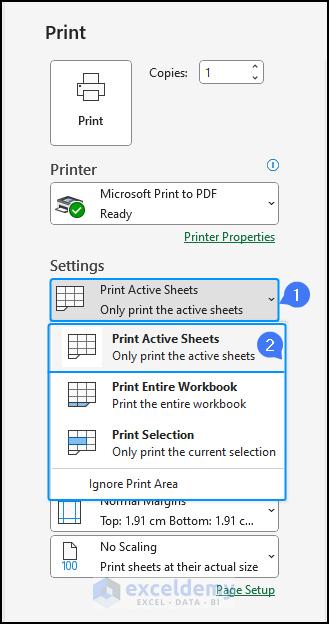
1. Select Print Area
1. Print Active Sheets: It allows you to print only the currently active sheets in your workbook. When you have a giant workbook, this feature helps you print specific sheets without printing the whole workbook.
2. Print Entire Workbook: This option helps to print the whole workbook in sequential order.
3. Print Selection: Select this option If you want to print a specific range of a worksheet, For example, cell range B4:E64.
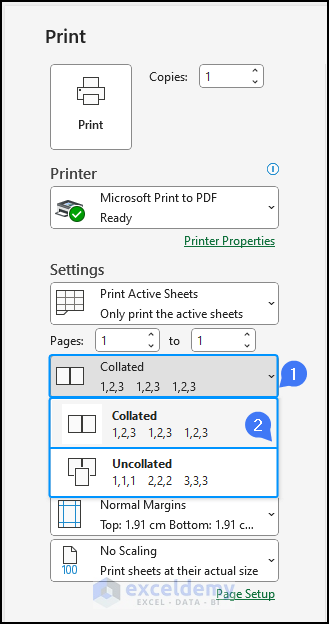
2. Arrange Pages in Desired Order
The second feature is useful when you have multiple copies to print. It has two options.
1. Collated: Use this option if you want to arrange your pages in the correct order. Generally, it is used while printing a report.
2. Uncollated: This option prints documents as individual sets. Booklets, Title Pages, Memo Cards, and Promotional Flyers are generally treated as uncollated printing.
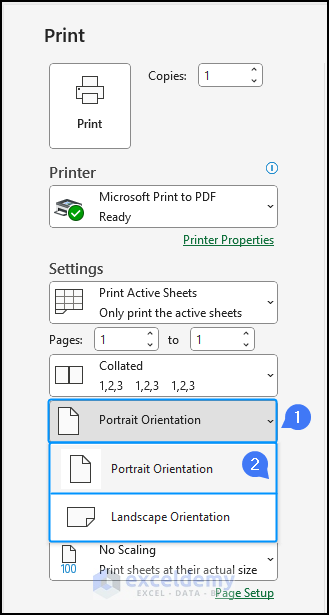
3. Change Page Orientation
The third feature allows you to set the orientation of the workbook. You can choose between Portrait and Landscape options based on the size and length of your dataset.
4. Select Page Sizes
The fourth option is very important for all users. As it offers you the option to choose the size of the paper to print your document. Although there are many sizes, the most common paper sizes in the professional world are A4, Letter, and Legal.

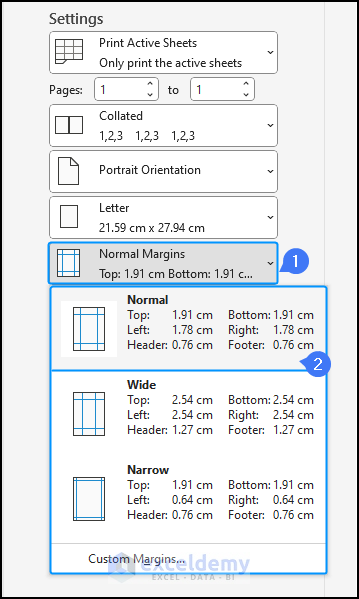
5. Set Up Page Margins
Next, we have the Margin Settings, which allow you to adjust the spaces between the content and the edges of the paper. By default, it is set to Normal Margins. However, there are two additional options available: Wide Margins and Narrow Margins. You can choose the appropriate margin setting based on your specific requirements.
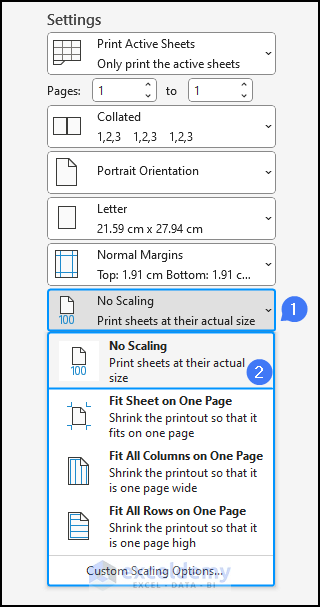
6. Adjust Page Scaling
Finally, the Scaling feature in print settings allows you to adjust the size of the content to fit on the printed page. There are four options.
1. No scaling: If you want to maintain the original size of the content as it appears in the workbook, select this option.
2. Fit Sheet on One Page: It adjusts the size of the content, including both columns and rows, to ensure it fits within the specified page.
3. Fit All Columns on One Page: It reduces the column width proportionally to fit all columns on the specified page.
4. Fit All Rows on One Page: Similar to the third option, It reduces the row height proportionally to fit all rows on the specified page.
In the print preview panel, you will find two options located at the bottom. On the left side, there is a page number selector that allows you to scroll through different pages of the document.
On the right side, you will find two additional options. The first one is Show Margins, which enables you to display or hide the margin lines in the print preview. Lastly, the second option is Zoom to Page which allows you to adjust the zoom level of the print preview.

How to Automatically Show Print Preview in Excel
The newer versions of Excel have some great features. Using these, you can check how your documents will look before printing. We will show all the tips and tricks here to enrich your knowledge and experience of Excel in printing preview. There are additional features available beyond the ones found in the Print option under the File tab.
1. Page Layout View
You can see the Print Preview without going to the print option from the file tab in Excel. Given that just click the Page Layout which is located at the bottom right corner of the status bar.
Click here to enlarge the image.
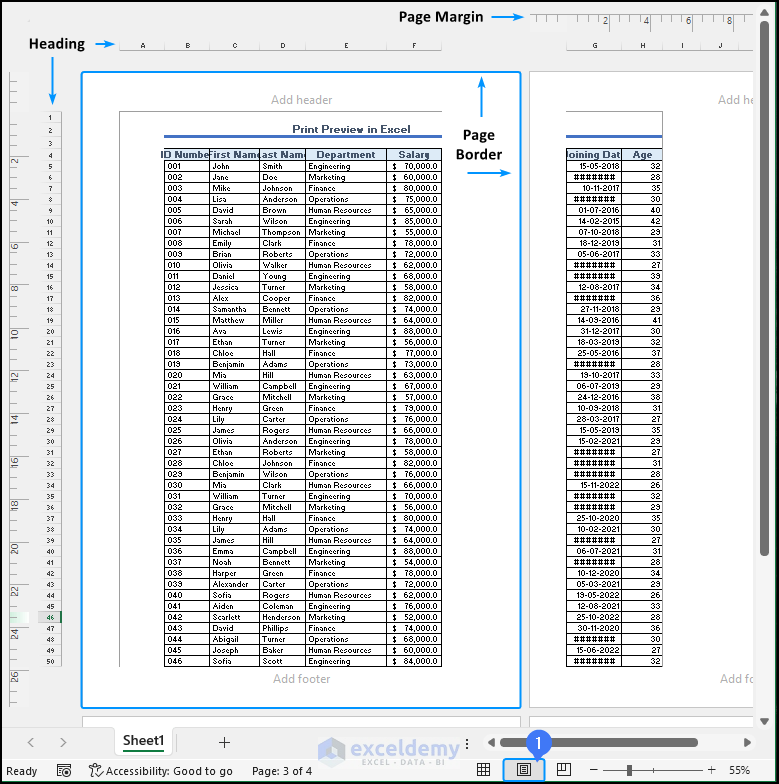
The print layout view is different in truth from the normal view in Excel. It will show you how your worksheet will look when printed, making it easier to adjust the layout and formatting as needed.
Surprisingly it will help you to see changes such as Margins, Header, and Footer Options, Page border, etc.
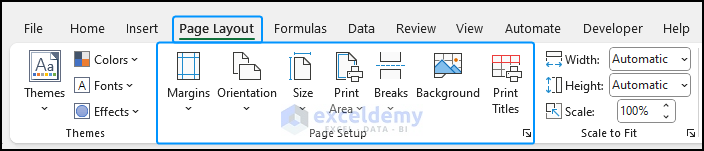
You can make necessary changes using the features in the page setup group from the Page Layout tab. Any changes you make will reflect correspondingly on the layout.
You can also add a header and footer from the print layout view of Excel. Check out the following steps.
First, locate and right-click on the Page Layout icon at the bottom right corner of the Status Bar of the Excel window. This will immediately switch you to the Page Layout view in a subsequent manner.
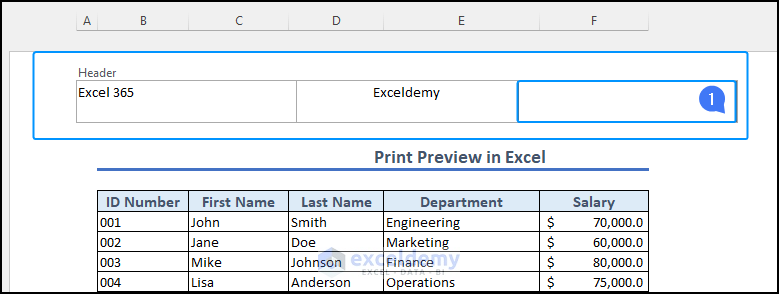
In the Page Layout view, you’ll notice predefined header and footer options labeled “Add header” or “Add footer“. Additionally, you’ll see three predefined segments within the header or footer area. Choose the segment that best suits your header content.
Now, double-click on the desired box (either the header or footer) where you want to add your text.
Finally, type in your desired text directly into the header or footer section.
Click here to enlarge the image.
Once you’ve entered your text, click outside the header or footer area to save it. Furthermore, you can also add page numbers, dates, file names, or pictures as headers or footers. Afterward, you can verify the formatting of your header by reviewing it in the Page Layout view.
3. Print Titles or Headings
If you prefer, you have the option to print the headings, including column and row numbers, on your Excel sheet. This can provide a helpful reference when reviewing or analyzing your data.
Go to the Page Layout tab in the Excel ribbon. Following that, in the Sheet Options group, check the box next to Print under the Headings column. As a consequence, this will enable the printing of column and row headings.

Click here to enlarge the image.
Furthermore, to see the changes, navigate to the “File” tab and click on “Print” to access the print preview pane.
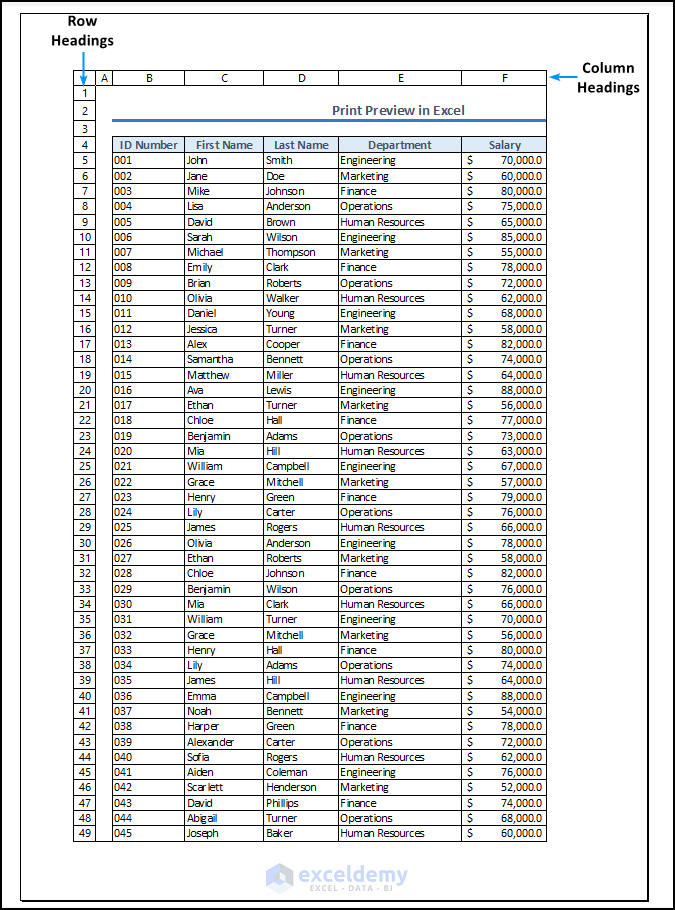
In the print preview pane, you will be able to observe the inclusion of the headings in the preview.
4. Page Break Preview
When printing large datasets in Excel, it can be challenging to fit them onto a single page while ensuring both optimal representation and minimizing wastage.
If your dataset doesn’t fit on one page and you want to quickly resolve the issue without manually adjusting the dataset, you can check out the following steps.
Click here to enlarge the image.
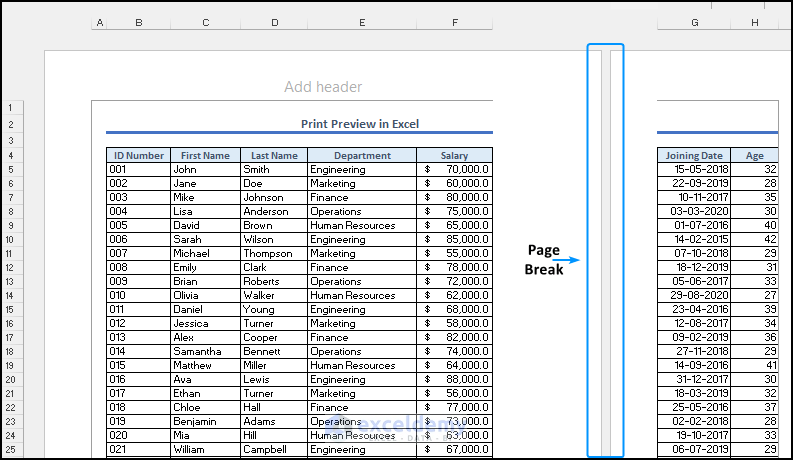
First, locate the page break preview at the bottom right corner of the status bar. Click it to open the page break preview window.
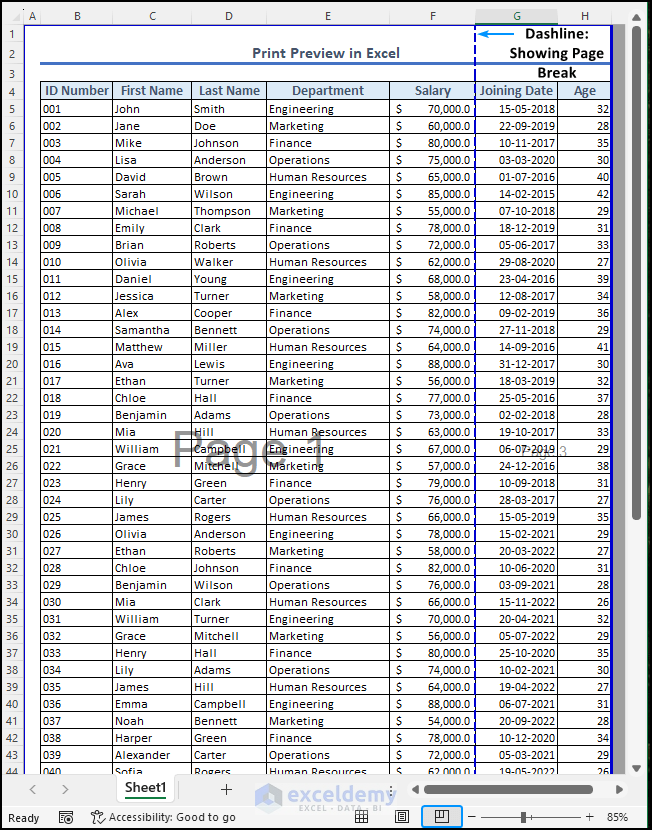
In the preview window, find the dashed line representing the page break. Markedly, move the line as needed to adjust the data on the page. To fit the dataset on one page, we moved the dashed line from the right of column F to column H as an example.

Click here to enlarge the image.
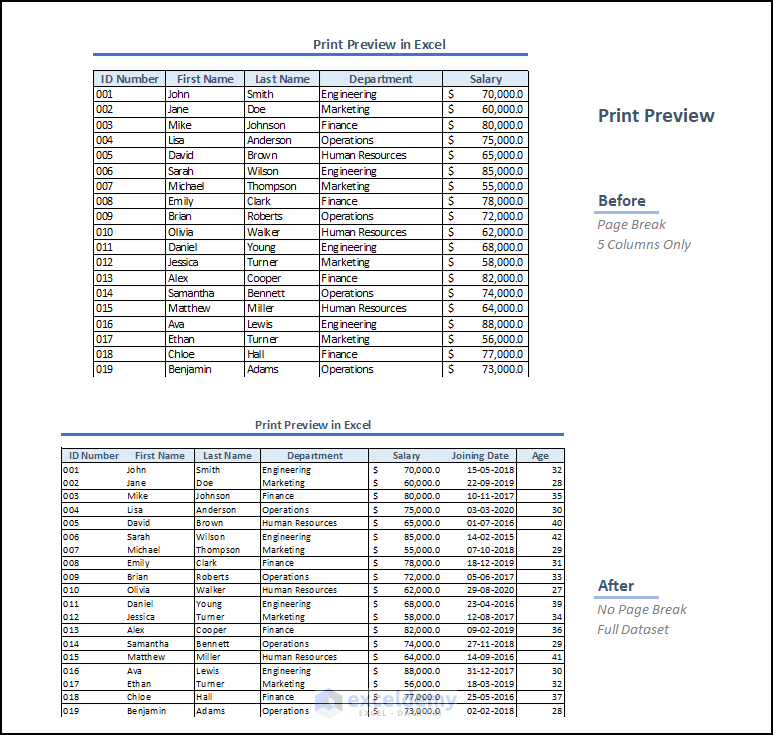
Thus, the data will automatically fit on the page accordingly. If necessary, the dataset will be condensed to fit on one page. By following these steps, you can easily adjust page breaks and ensure your data fits on a single page.
Click here to enlarge the image.
Things to Remember
- To directly jump into the print menu, use the keyboard shortcut CTRL+F2.
- Avoid awkward page breaks by using page break preview or Fit to Page options from the print menu.
- Check margins, orientation, and page size to optimize the use of space.
Download Practice Workbook
Conclusion
The print preview in Excel works as a lens through which we can view and refine our worksheets and documents before printing. It allows us to observe and perfect the arrangement of page breaks, the scaling of the content, and the use of the space on the page. Ensuring every element plays its role harmoniously on the printed stage. Moreover, print preview acts as a discerning editor, offering a critical eye to catch errors.
Frequently Asked Questions
1. What is the print preview?
Print preview is a feature that allows you to see how your document or worksheet will look when printed. It helps you review and adjust the layout, formatting, and content before actually printing.
2. How do I print preview in Excel without a printer?
In Excel, you can use the print preview feature even if you don’t have a physical printer connected. It allows you to review both the appearance of the document on the screen before saving and sharing it electronically.
3. Why is print preview different from Excel?
Print preview in Excel provides a visual representation of how your worksheet or document will look when it’s printed. Even more, it gives you an overview of the entire printed page, including the placement of page breaks, the scaling of the content to fit the page, and the appearance of headers and footers.
Print Preview in Excel : Knowledge Hub
<< Go Back to Print in Excel | Learn Excel

