Excel usage is widespread and Excel is often the go-to Office application for data entry, analysis, and manipulation. Microsoft Access provides relational database capability in a compact desktop environment. Fewer people use Access, even though it has many features for handling data and the interface is user-friendly. Access has all the functionality of a relational database application including the ability to create tables, specify and restrict data types for each table, create simple and advanced queries, SQL manipulation, and form creation for user input. Excel, in addition to being the more familiar interface, has advanced charting capabilities and extended Pivot Table functionality and options.
Integration of Excel and Access, allows one to take advantage of the ease of data entry and advanced charting capabilities of Excel, combined with the relational database interface and environment of Access.
Here are a few handy tips for exchanging data between the two Office Applications:
1) Understanding the logic involved in Access table structure and creation
Access is a relational database as mentioned. This means the tables in the Access database are all related to one another. Each record in an Access database should be able to be uniquely identified. This is achieved through the use of a primary key. This primary key usually consists of one field, however, in some cases, it can be a combination of more than one field. This primary key is mandatory and Access automatically adds an ID column, which serves as the primary key for the table. In Excel a primary key is not a mandatory requirement when creating tables, so users often leave it out.
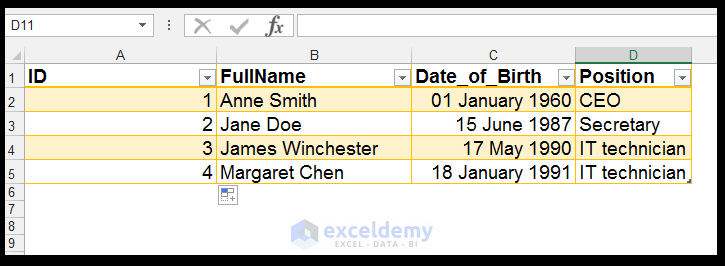
This situation is shown below, the first image shows the Access table in both Datasheet and Design View and the primary key that is automatically added. The second image shows the Excel table and the way, the data would most likely be entered in Excel.

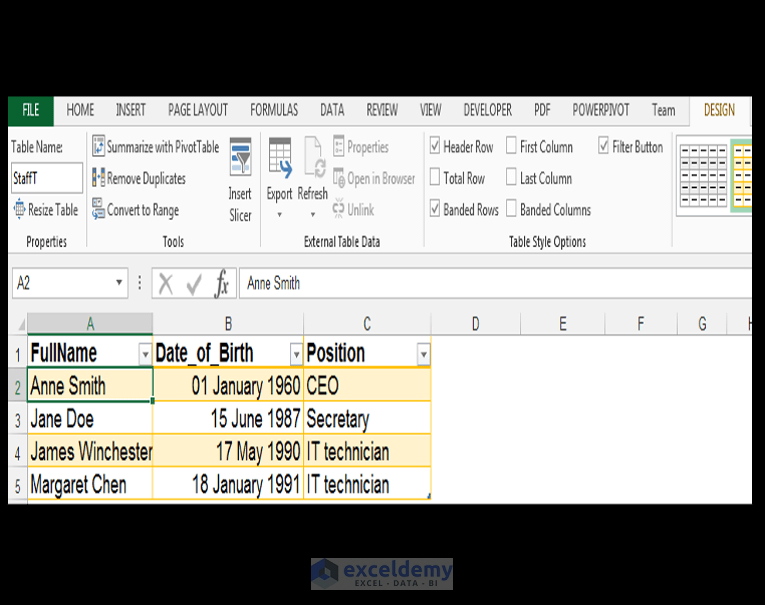
The data entry in the Excel table is not incorrect. However, if you are planning to use Excel as the data entry software and then import the tables into Access later on (this is analogous to using Excel as a user-friendly form for Access in a way), then it’s best, from the onset to add a primary key to the Excel table, when setting up the spreadsheet in Excel.
This is to ensure that users get familiarized and orientated with the primary key concept and to eliminate data redundancy and duplication early on, as much as is possible. This is simple enough to do in Excel when creating tables in Excel. If you have a relatively small table, that does not already contain a primary key column, and there is no duplication or redundancy in the Excel table you can easily add this column. Simply, right-click a cell in your first column in the table, choose Insert, Table Columns to the Left. Then rename this column and call it ID. To populate this column, select the first cell of the column and type in 1, then go to the second cell of the column and type in 2, and then highlight the above two cells and drag down using Autofill to populate the rest of the column.
Also, a handy tip to remember is that the field names in Access tables are equivalent to the column headings in Excel tables.
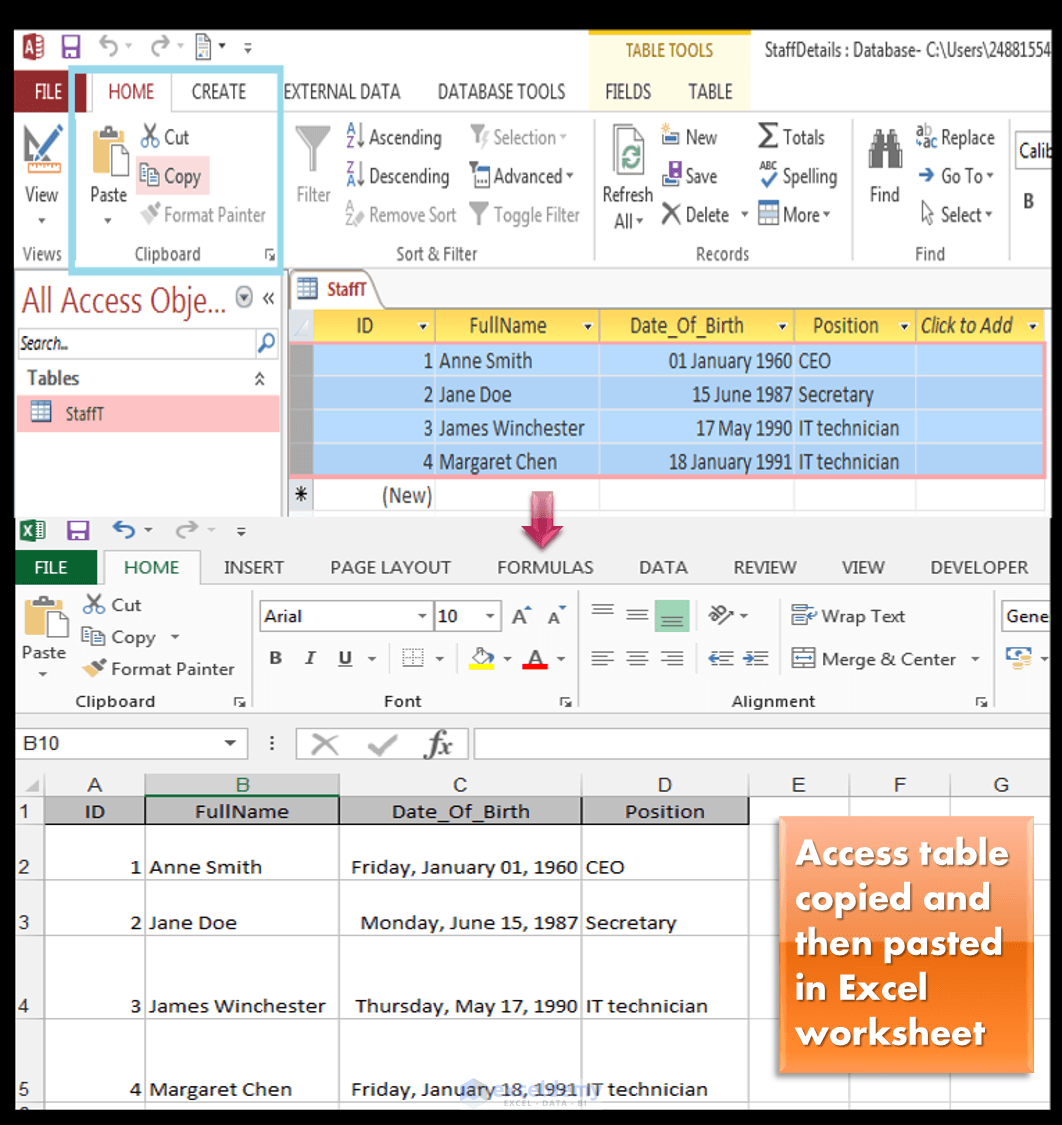
You can also copy the data in the table from Access and paste it into a new sheet in Excel. This is advisable for an Access table with a small amount of data. Select all the rows in Access that you want to copy, go to Home tab, in the Clipboard group, choose Copy, or press CTRL-C on your keyboard.
Then on a new sheet in the Excel Workbook, press CTRL-V on your keyboard to paste the Access table in the Excel sheet. The Access table is pasted as a range with headings and can be converted to an Excel table, by selecting a cell in the range and pressing CTRL-T on your keyboard. Make sure the checkbox, my table has headers is ticked, and then press Ok, in order to convert the range to an Excel table.
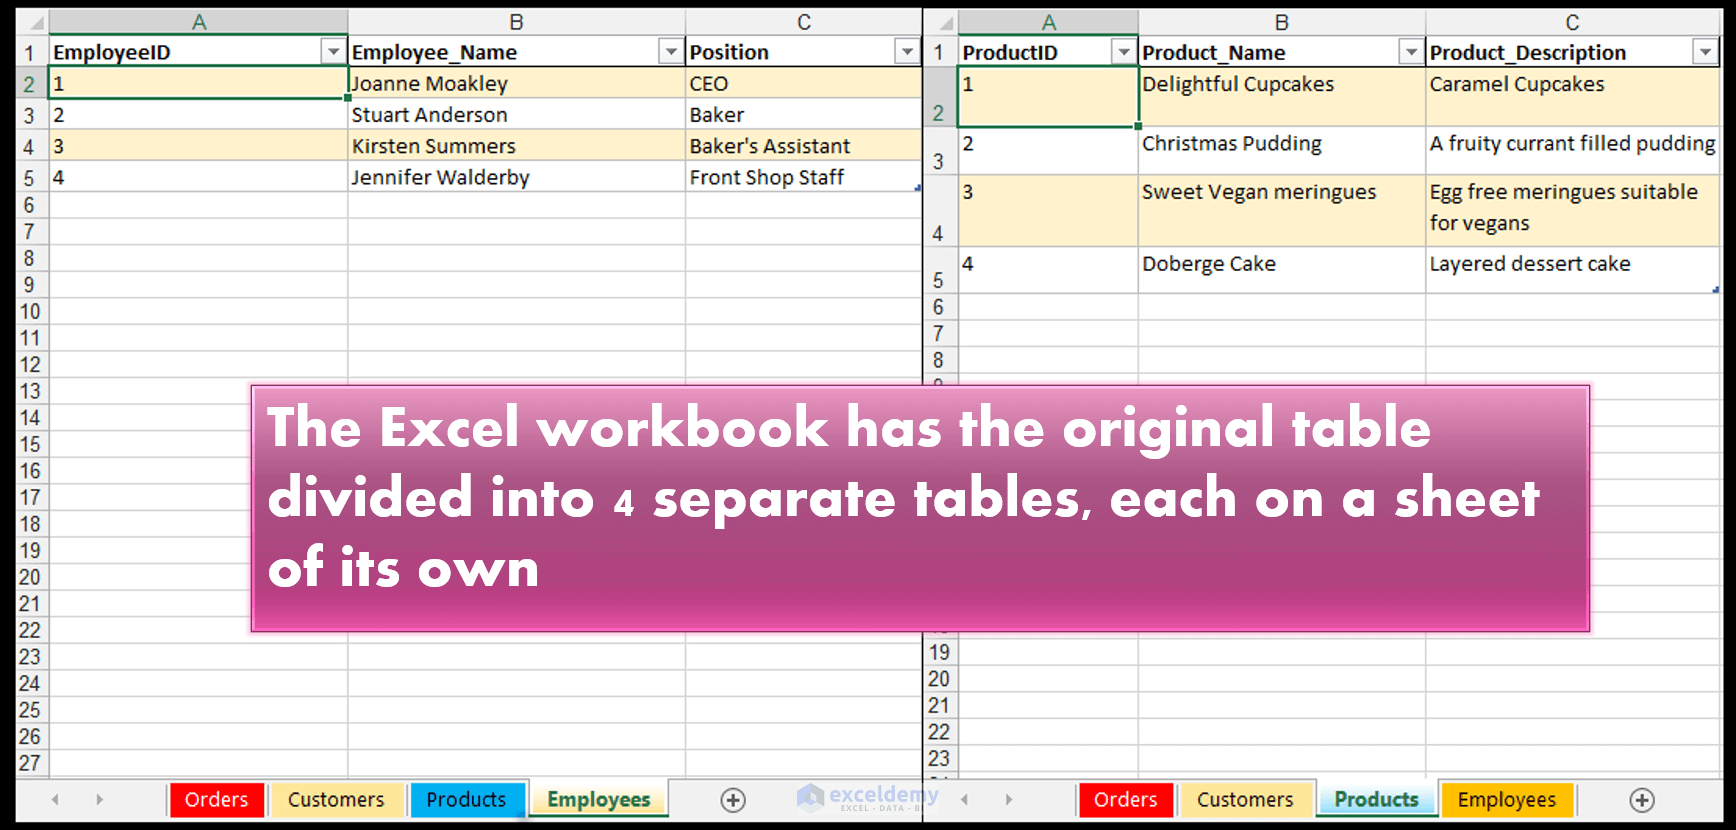
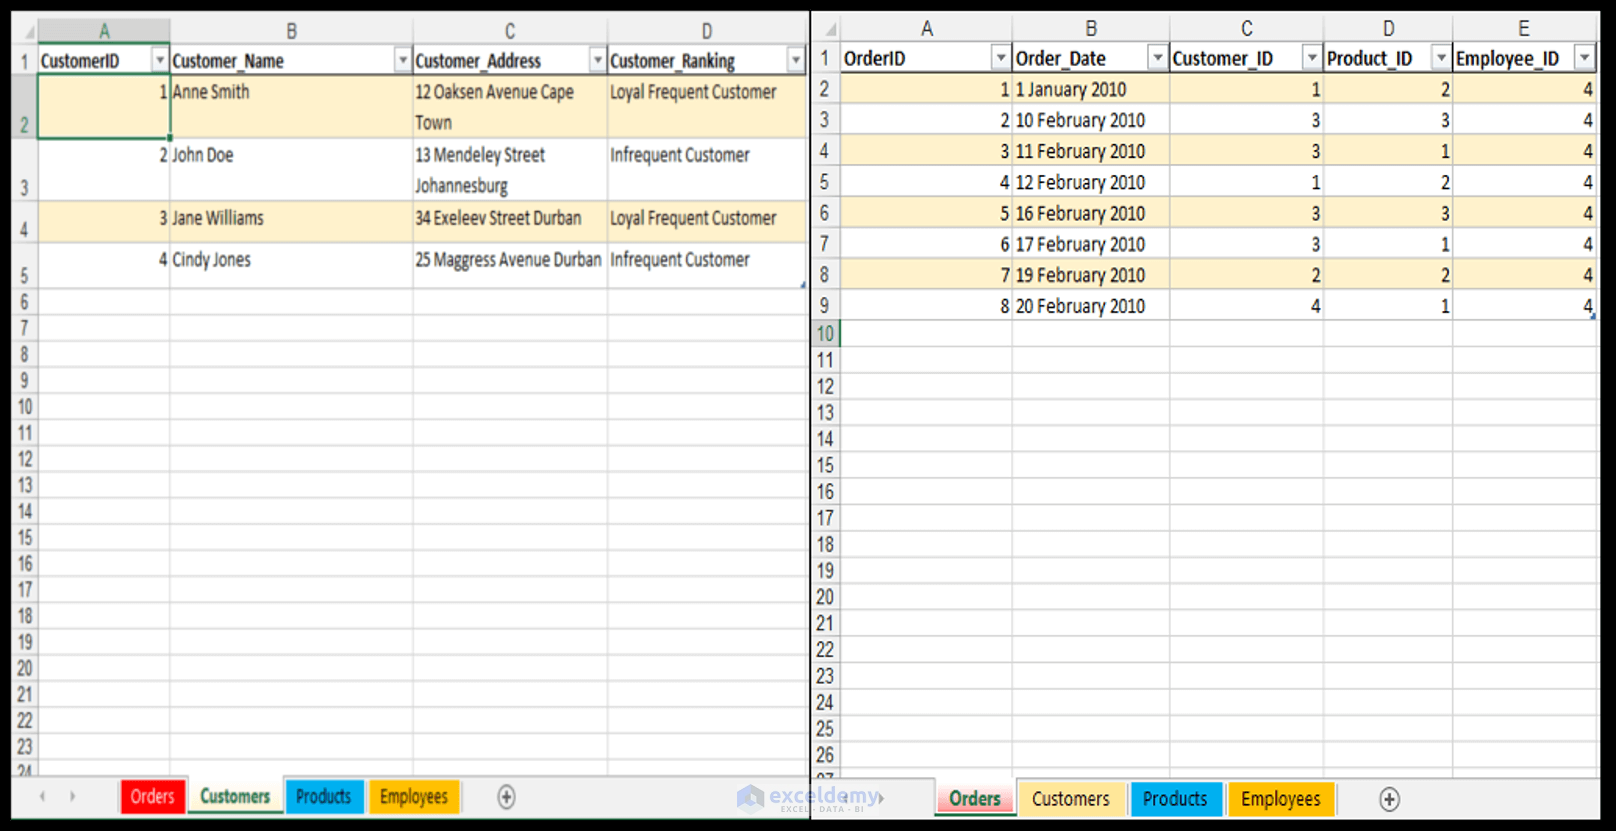
Leading on from the above-mentioned points. In Access, the information is divided into major entities or subjects. For example, an Access database designed for a small store would more than likely contain separate tables called Products, Orders, Customers, and Employees (with the relationships designated). In Excel, it is not unusual to see the information, which would be stored in separate tables in Access, combined in one Excel table, as shown below.
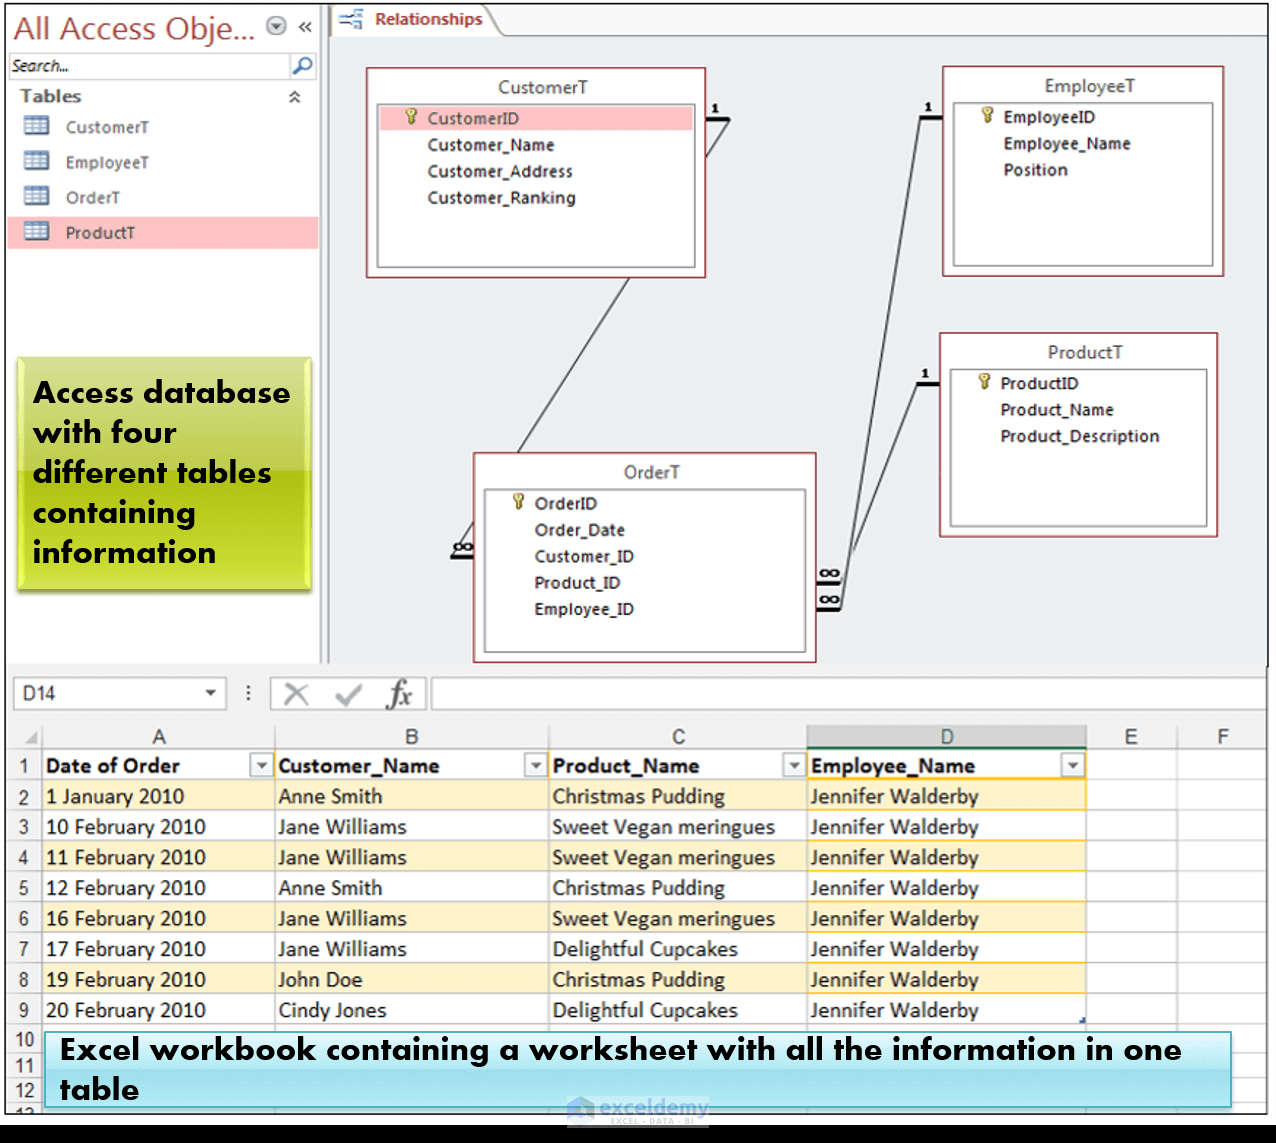
Now as mentioned, the way the data is entered into the Excel table is not incorrect. However, if Excel and Access are going to be integrated, in terms of Excel is the data entry software and Access provides the querying and database functionality. It is best to divide the information in Excel that’s stored in one big table into four smaller tables, and place each table on its own sheet as shown below. Also, it’s advisable to match the names of the fields in the table in Access, to the headings of the columns in the table in Excel, in order to avoid confusion and maintain consistency.
2) Removal of duplicates in Excel, for ease of subsequent table design or integration of the source data into Access
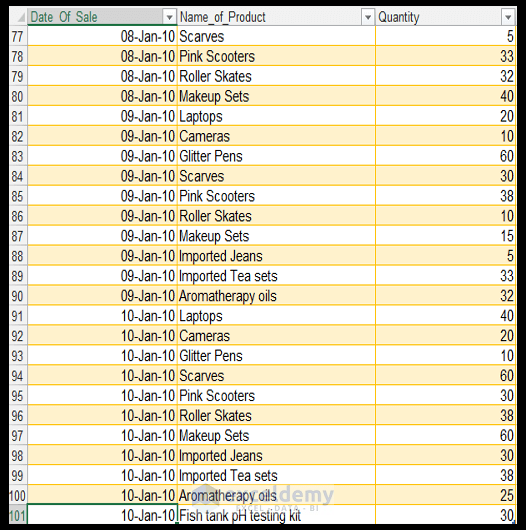
It is often difficult to see unique values, at a glance, in Excel tables that contain many rows of data. Let’s say one wanted to see the number of unique products for an Excel table, that contained 100 rows of data, in order to design an efficient table in Access using the information gleaned from the Excel workbook. The Excel workbook in this example is based on some data from a hypothetical online retailer. The Excel table contains the date the product was sold, the name of the product, and the quantity sold as shown below.
Firstly, make a copy of the spreadsheet containing the table in the workbook, in order to keep the original data intact and then work on the copy. With a cell in the Excel table selected, in order to activate the context-sensitive Table Tools options, select the Design tab, and in the Tools group, choose the Remove Duplicates option as shown below.

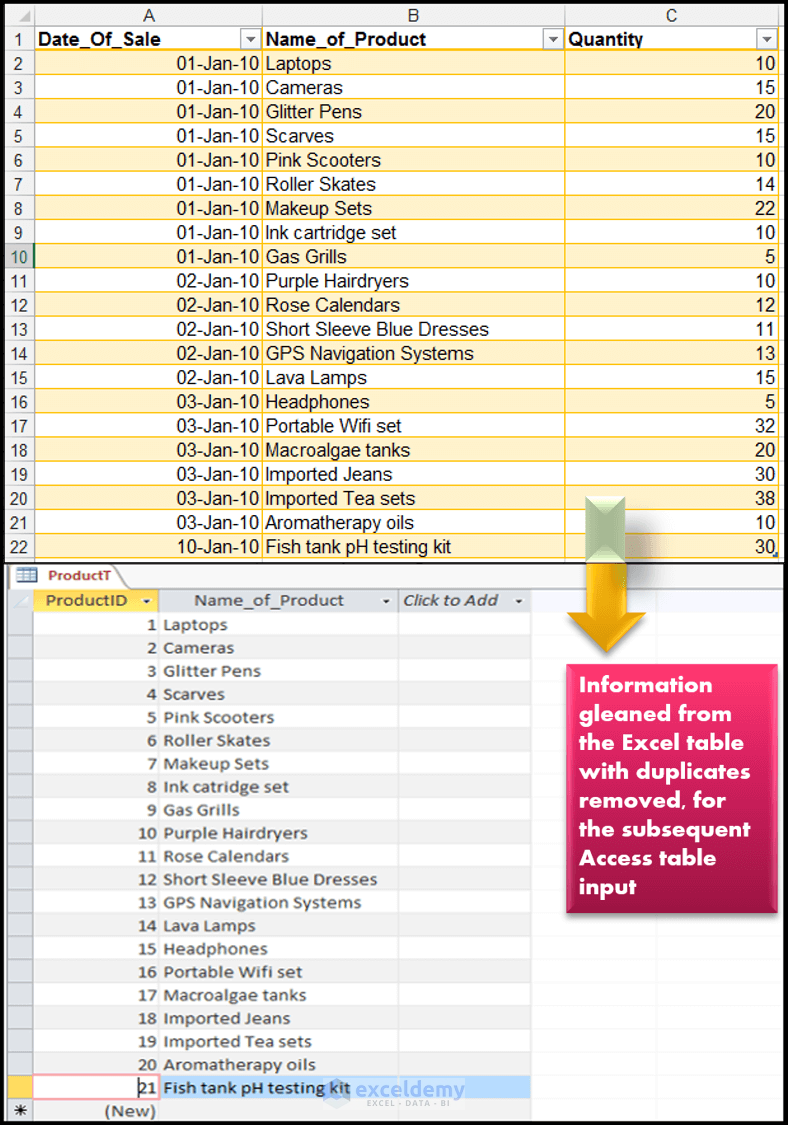
The Remove Duplicates dialog box should come up and uncheck Date_Of_Sale and Quantity and click Ok. A message box should pop up stating how many duplicate values were removed. Click Ok.

The resultant table in Excel can be used to help glean information for the Access table for the online retailer’s proposed Access database.
Read More: How to Copy Unique Values to Another Worksheet in Excel (5 Methods)
3) Using the TRIM Function() to remove unnecessary spaces and using the underscore to maintain consistency between field names in Access and column headings in Excel
Access field names cannot begin with leading spaces, so one can use the TRIM function() on the names of the column headings of tables in Excel, in order to remove spaces.
Also, let’s say eventually one needs to import data to SQL Server or another database such as Oracle. So, the flow of the integrated solution will be data entry in Excel, then exporting this data to Access, and then importing the Access tables into enterprise-level databases such as SQL Server or Oracle. Other databases do not read spaces between names of fields very well. So instead of calling the name of the heading column in the Excel table, Name of Product call it Name_of_Product, using underscores for ease of integration into other databases further down the line. SQL also handles this naming style of tables much better, than names with spaces.
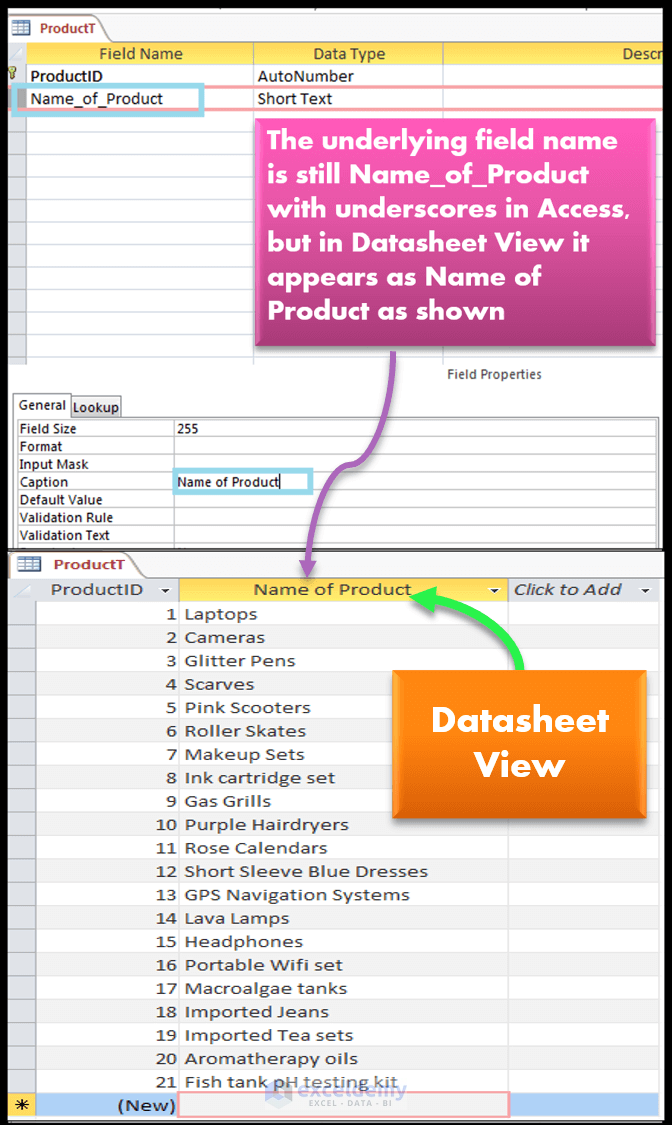
One can use the caption property in Access, so if your field name in your table is Name_of_Product, enter the caption or label as Name of Product in design view. So in datasheet view or on forms Name of Product is used instead, while the underlying field name has the underscores. This is mainly for aesthetic purposes for front-end viewers of the database in Access.
Similar Readings
- Run Time Error 1004: PasteSpecial Method of Range Class Failed
- Formula to Copy and Paste Values in Excel (5 Examples)
- How to Paste Link and Transpose in Excel (8 Quick Ways)
- Copy and Paste in Excel with Merged Cells (2 Methods)
- How to Copy Visible Cells Only without Header Using VBA
4) Importing data into Access from Excel – dealing with the two main scenarios
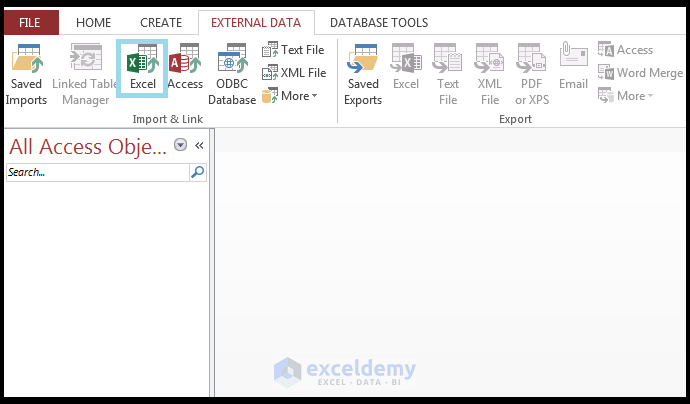
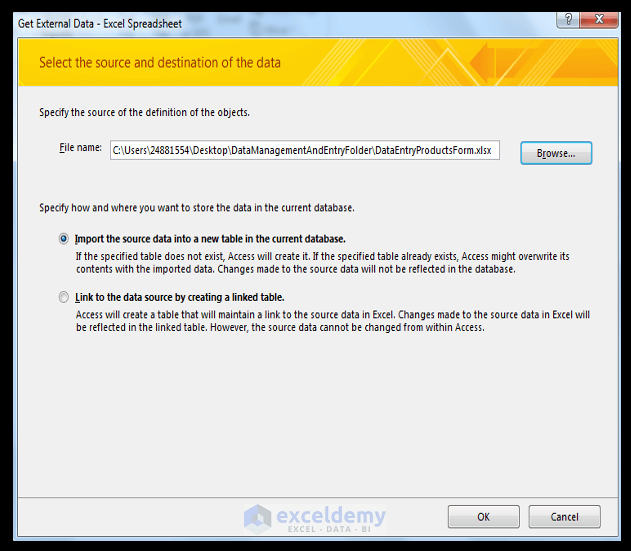
- In scenario one, one has a totally blank Access database, and one wants to import the data from Excel (the tables in Excel are set up with IDs and redundancy and duplication are reduced as much as is possible) and use Excel as the data entry program or form. With the Access database open, go to the External Data tab, in the Import & Link group, choose Excel as shown.
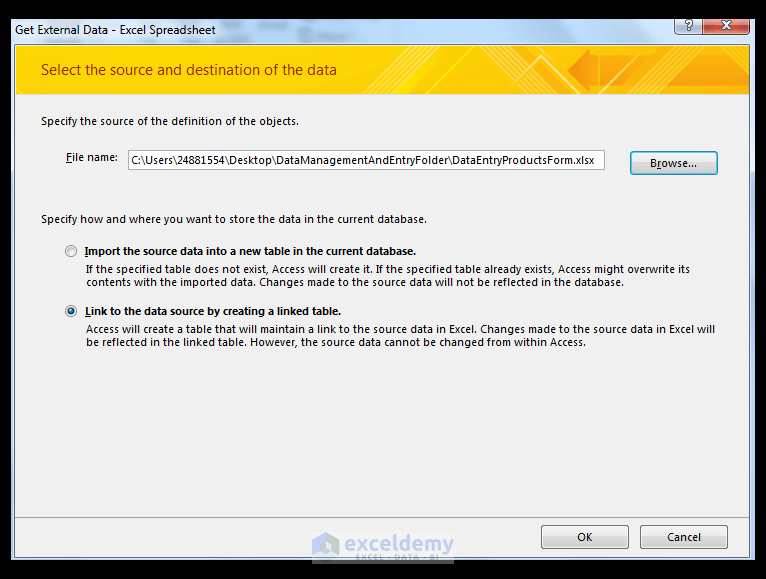
The Get External Data – Excel Spreadsheet Wizard should pop up. Navigate to the Excel Workbook that contains the data. Choose the Link to the data source by creating a linked table option. This allows data entry in Excel since we want users to enter the data in Excel. Any changes made to this data in Excel are reflected in Access, but nothing can be edited in Access. It’s almost ready-only in Access, in terms of data entry in datasheet view. Click Ok.
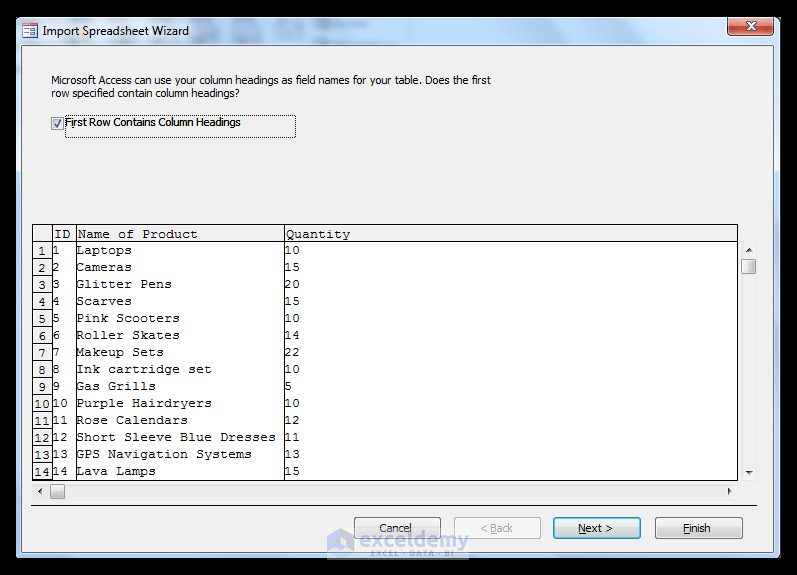
If the table is set up correctly in Excel, Access will automatically detect and check that the First Row Contains Column Headings as shown below.

Clicking Next leads one to the final step in the process, which asks one to enter a linked table name and then click Finish.
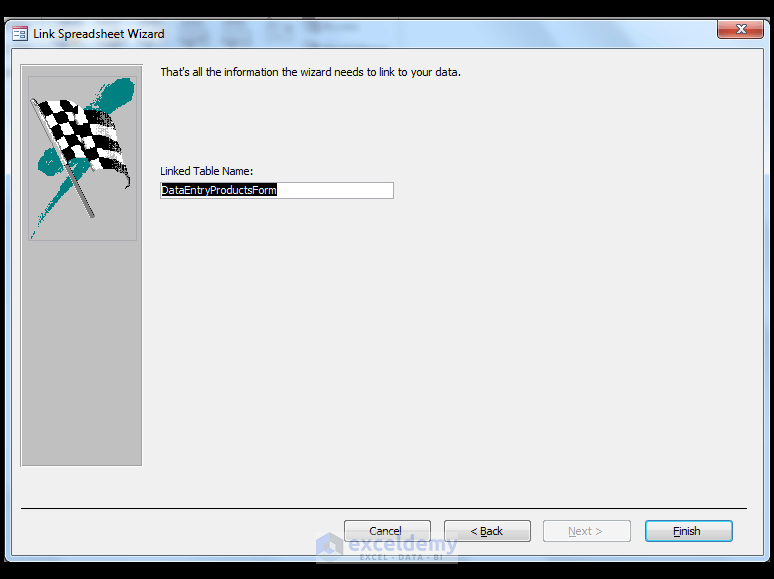
A message should pop up to say the table has been linked.

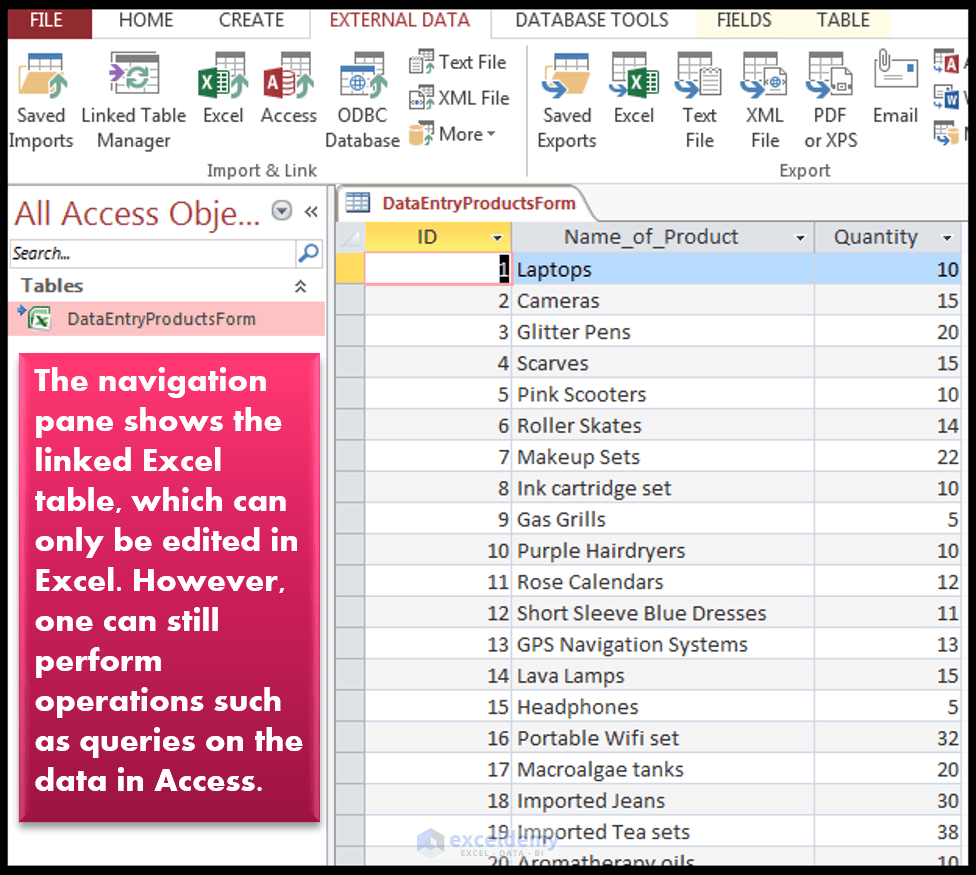

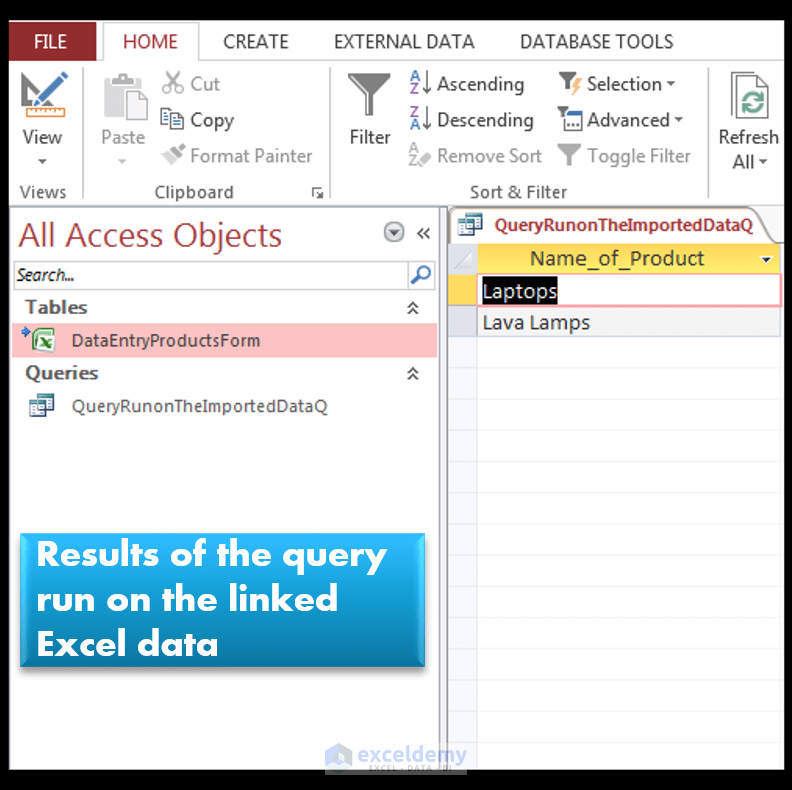
This exposes the Excel data to the additional SQL functionality, and expression builders for complex query creation, available in the Access environment. The results of the complex queries could later be used in Excel dashboards. It is advisable, but not mandatory to keep the Excel data entry tables and the Access database with the linked tables in the same folder or directory just for organizational purposes.
- In scenario two, one has a blank or populated Access database and one wants to import Excel tables, but not have them linked. One wants to edit them in Access. In that way whatever changes are made later on in the Excel sheet are not reflected in Access and one then has the data entirely in Access for editing and querying. This is usually the option chosen when one needs to strictly maintain control, of the types of data entered in the tables.
Again, with your Access database open, go to the External Data tab, in the Import & Link group, choose Excel as shown.

In this case, when the wizard pops up, choose to Import the source data into a new table in the current database, in order to create a copy of the table in Access that is now unlinked to the original Excel table. Click Ok.
Click Next on the next screen.
One then gets to specify the information about the fields one is importing, as shown below. The wizard also allows one to choose which fields to skip as well. Since often Excel tables may contain data that actually needs to be in other tables in Access, one can then avoid importing these columns into the current table.

One can then let Access add a primary key, or choose one’s own primary key. In this case, since the table already had a designated ID column in Excel, the second option was chosen as shown.

Click Next.
Then choose a name for the table in Access and click Finish.

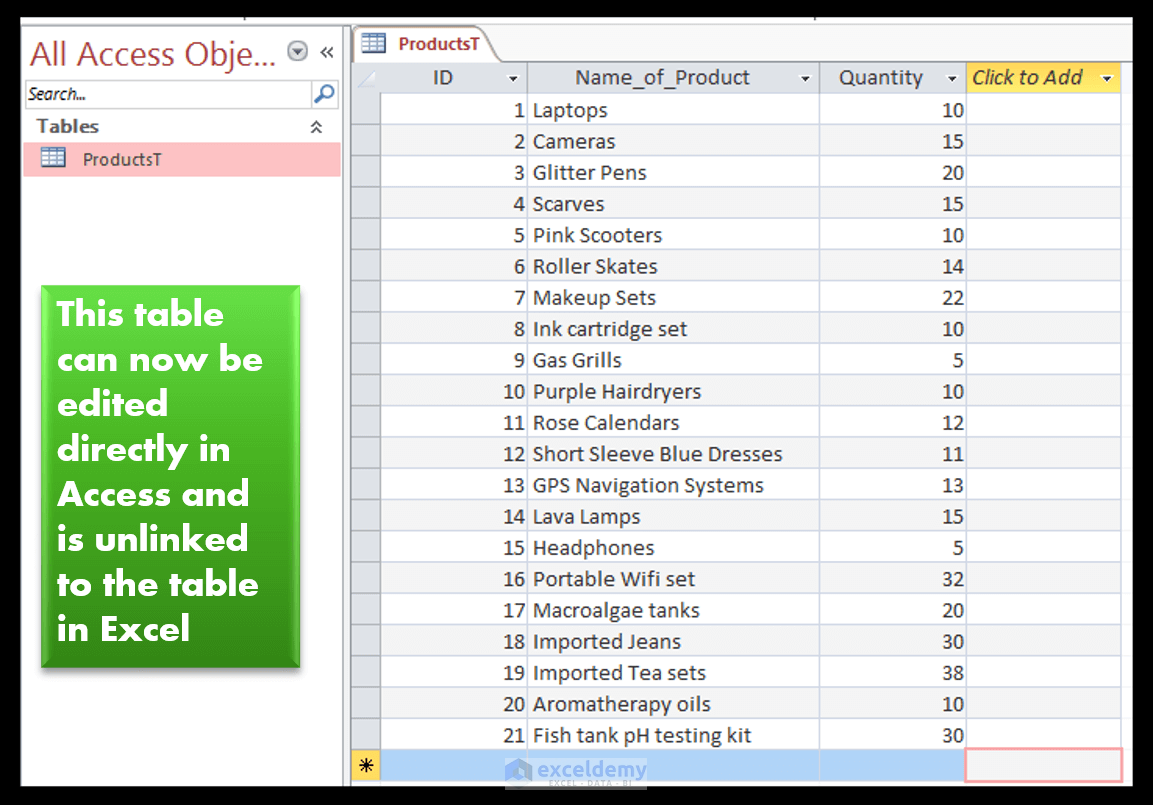
You’ll be asked whether you want to save the import steps, for now just click close. The table is now in Access for further editing, entry, and manipulation and is unlinked to the Excel workbook.
5) Using Table Analyzer to normalize imported data and split the data into separate tables in Access
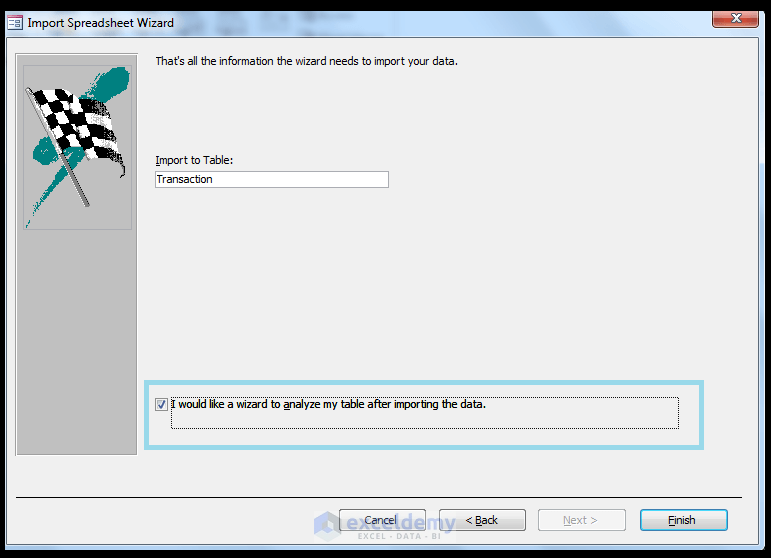
Later versions of Access, have the Table Analyzer tool, which helps users separate one table into many tables. This is especially useful if one did import the data from a big Excel table and one is struggling to separate the tables. One can launch this wizard as part of the import process and check the box, I would like a wizard to analyze my table after importing the data as shown below.
Or one can access it, if the tables are already imported as standalone Access tables, by going to Database Tools, in the Analyze group, choose Analyze Table.

The Table Analyzer wizard should be launched, which will guide you through the steps of creating separate tables.
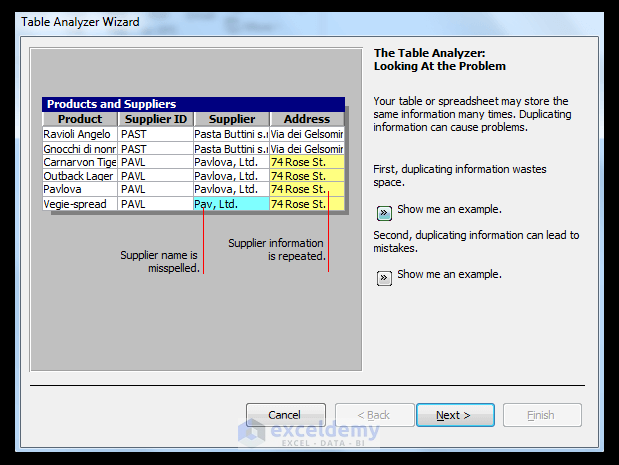
Table Analyzer, however, does not always guess right, so use it with caution.
6) Importing data from Access into Excel and using VLOOKUP to link the data and populate columns
One can import Access tables into Excel worksheets. With an Excel workbook opened, go to the Data tab, in the Get External Data group, choose From Access as shown below.

Navigate to the Access database containing the tables, you want to import into your Excel spreadsheet.

Select the table one wants to import, in this case, the ProductT.
Click Ok.
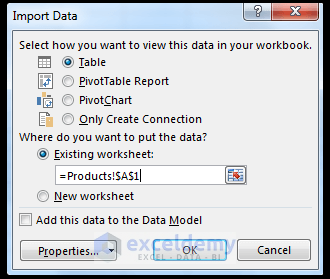
Choose to Import the data as a Table, on the existing worksheet, choose cell A1, and then Click Ok.

The table is imported as an Excel table.
The same was done for the three other tables in the database, namely Orders, Employees, and Customers tables.
One now has an Orders table which looks like the one below.

This table with numbers in Customer_ID, Product_ID, and Employee_ID can be counter-intuitive and confusing for Excel users not used to the relational database theory and tables. Thus one could add three helper columns to the table called Actual_Customer, Actual_Product, and Actual_Employee as shown below.

In Cell F2, the following formula was used:
=VLOOKUP([@[Customer_ID]],Table_TablesToBeImportedIntoExcel.accdb5,2,FALSE)
Where, [@[Customer_ID]] refers to cell C2, which contains the lookup value, Table_TablesToBeImportedIntoExcel.accdb5 refers to the imported Customers table on the Customers sheet, (Excel gives this table a default name), highlight the data, but not the column headings, the same way one would for a normal VLOOKUP, the customer name is in column 2, and the type of lookup is an exact match.
Double click and send the formula down to populate the Actual_Customer column.

Do the same thing to populate the Actual_Product and Actual_Employee columns. So one can quickly repopulate Excel tables with actual text values as needed, using the VLOOKUP functionality in order to orientate the Excel users.

7) Using data already set up in a relational Access database, for Power Pivot manipulation
Power Pivot is a Business Intelligence tool available with Excel 2013 and later versions of Excel. It also requires data to be input in a relational manner. So, what you can do when you are importing Access tables into Excel (already normalized and designed using relational data logic), is to add the imported tables to the data model.
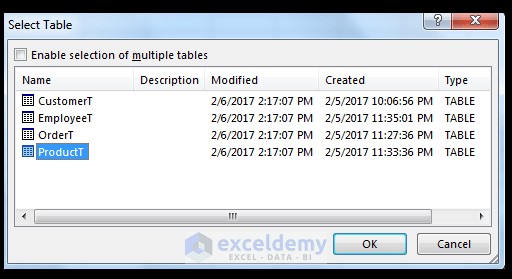
In a blank workbook, go to Data, get External data and choose from Access as for the case above. However, this time when asked to select a table, check the Enable selection of multiple tables option in the Select Table dialog box and select all the tables as shown below:

Click Ok.
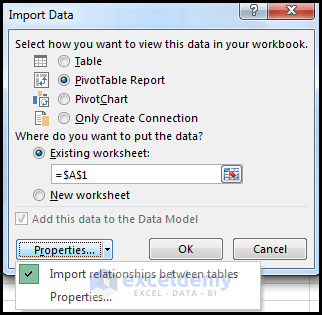
Make sure the PivotTable Report option is selected, the Add this data to the Data Model should be checked because we imported multiple tables. If you only import one table at a time, you will need to check this option yourself. If you click on the drop-down arrow next to Properties, you should see that the relationships between the tables will also be imported.
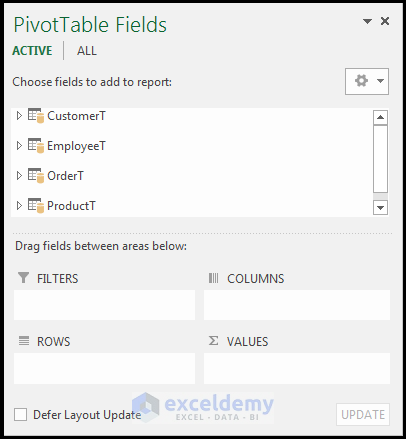
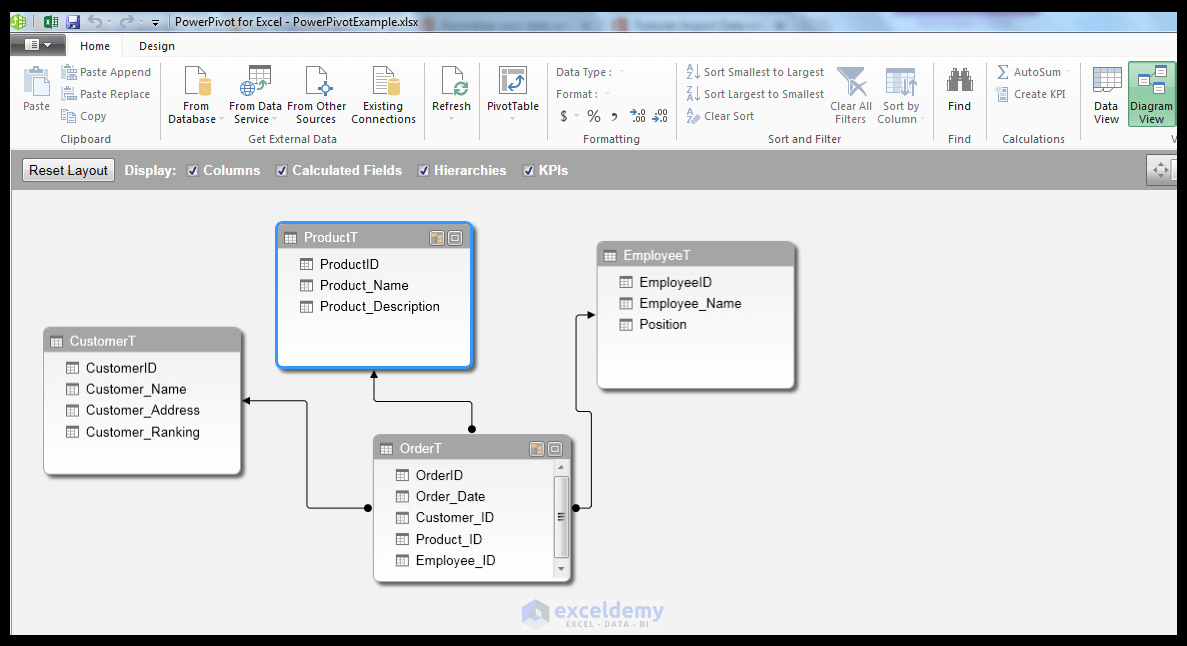
Click Ok to create the Pivot TableReport, with the tables already added to the Data Model. The relationships should be visible in the PowerPivot for Excel Window, Diagram view. Thus the data is ready for further manipulation using Power Pivot functionality.
Download Files
Exchange-Data-Between-Access-and-Excel
Conclusion
Excel and Access integration allow one tallow advantage of the combination of features in Excel and Access. The key to integrating Excel and Access successfully is understanding a little bit about relational database design basics.
Understanding a little bit of relational design and table structure will also set you in good stead with respect to taking advantage of Power Pivot and related Business Intelligence tools in the Excel environment.
Please feel free to comment and tell us if you integrate Excel and Access, whether or not you use Power Pivot, and any other tips for integrating Excel and Access, that you may have.
Related Articles
- Excel VBA: Copy Cell Value and Paste to Another Cell
- Excel VBA: Copy Range to Another Workbook
- [Fixed]: Right Click Copy and Paste Not Working in Excel (11 Solutions)
- Difference Between Paste and Paste Special in Excel
- How to Copy Alternate Rows in Excel (4 Ways)
- How to Apply VBA PasteSpecial and Keep Source Formatting in Excel

