The Quick Access Toolbar is a customizable toolbar in Excel that provides quick access to frequently used commands. However, a user may not find all the commands they require for their particular work in the Quick Access Toolbar’s default settings. Customizing Excel’s Quick Access Toolbar is useful in this situation.
In this article, we will explore how to customize the Quick Access Toolbar (QAT) in Excel. Adding or removing commands, moving the toolbar, making custom buttons, altering the icon and name of commands, resetting the toolbar, and sharing personalized toolbars with others are some of the subjects we’ll discuss. The readers of this article will be able to customize their Quick Access Toolbar in accordance with their demands and streamline their work process, which will eventually save them time and increase their Excel productivity.
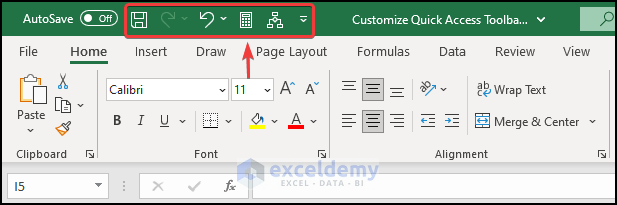
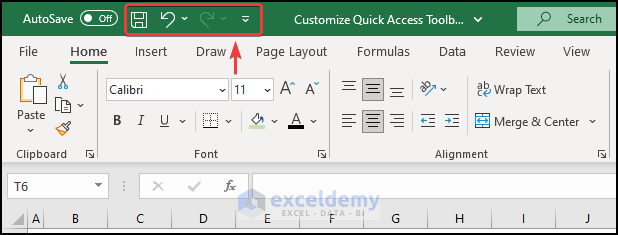
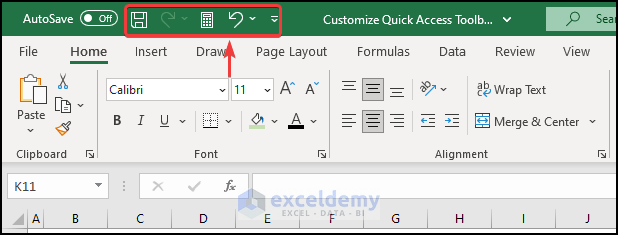
Below is an overview image of customized the Quick Access Toolbar in Excel.
What Is the Quick Access Toolbar?
The QAT is a small customizable toolbar that is located at the top of the Excel’s application window. Mainly it contains a set of commands that are used frequently. Independent of the ribbon tab that is now open, these commands can be accessed from practically anywhere in the application.
The QAT contains a drop-down icon where you will find default commands. You can add or hide a command from there. It also has an option to add your own command.
How to Show QAT in Excel
Here, we will show you how you can show the Quick Access Toolbar in Excel by using any tab from the ribbon.
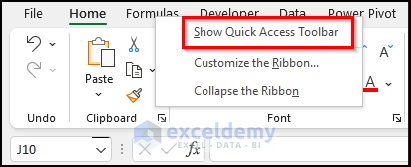
- Firstly, right-click on any tab from the Ribbon.
- Secondly, select Show Quick Access Toolbar.
- Now, you will see the QAT.
How to Customize the Quick Access Toolbar in Excel: 7 Easy Tricks
By default, QAT is in the upper left corner of the Excel window although you can change its position to suit your needs. This QAT contains a set of frequently used commands. Now, these commands may vary from user to user depending on their needs. So, we will see in this tutorial how to set up this QAT for our own work requirements.
1. Moving the Quick Access Toolbar Above the Ribbon
One of the common ways to customize the QAT is to move it above or below the ribbon in Excel. We will see how to achieve this using the following method.
📌 Steps:
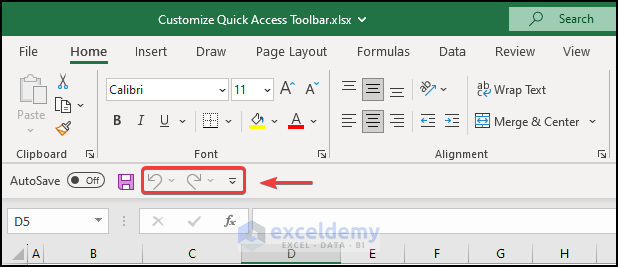
- Here, we can see the Quick Access toolbar below the Ribbon in Excel. Now, we want to move it above the Ribbon.
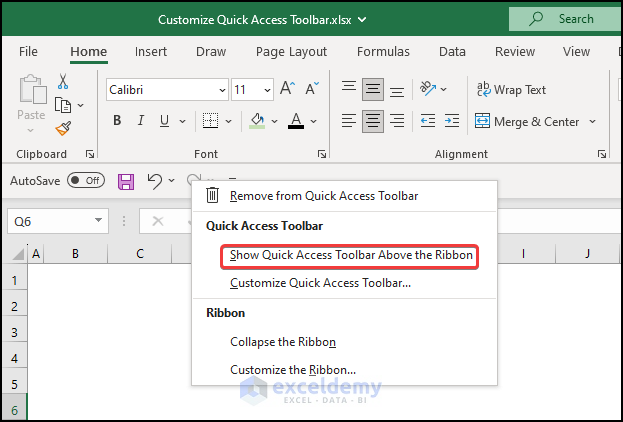
- First, right-click on the QAT and select Show Quick Access Toolbar Above the Ribbon.
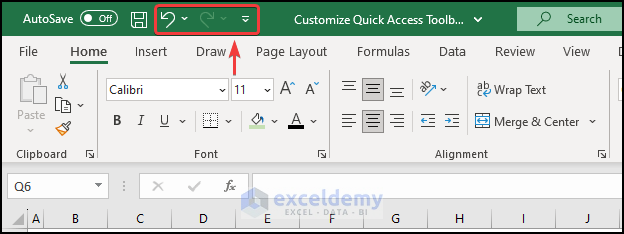
- As a result, this will move the QAT above the ribbon as you can see in the image below.
2. Adding a Command to the Quick Access Toolbar
If you want to add a command to the QAT in Excel that you use frequently, then you can customize it as we have shown below.
📌 Steps:
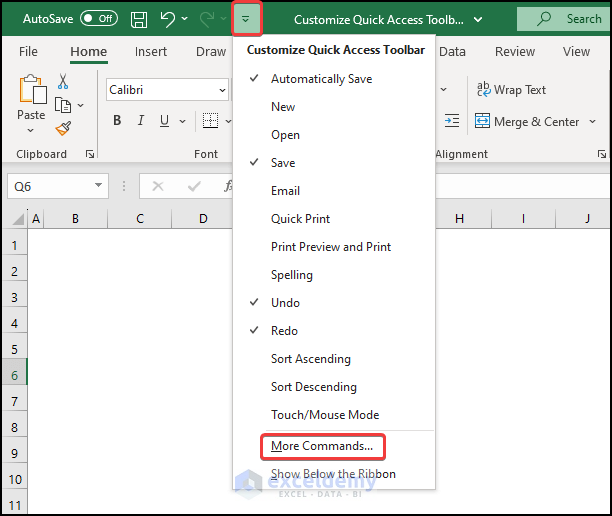
- To start with, click on the drop-down icon and select More Commands.
- Immediately, this will open the Excel Options window where you can see the Quick Access Toolbar.
- Here, select a command from the commands list and click Add.
- Now, this will add the command to the command list on the right side.
- Finally, click OK.
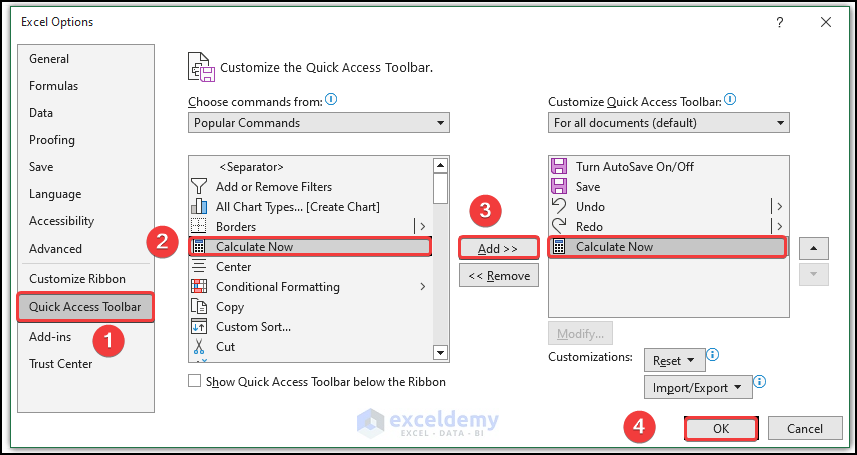
- Therefore, you will get QAT with the Calculate Now command.

3. Removing a Command from the Quick Access Toolbar
Sometimes you may want to clear up the Quick Access Toolbar a bit by removing unused commands. You can customize the removal by following the steps below.
📌 Steps:
- Here, in the below image, we can see QAT with the Calculate Now command. We now want to get rid of this command.
- First, click the drop-down arrow and then choose More Commands.

- Therefore, the Excel Options window will appear.
- Now, select a command that you want to remove from the right side box and click <<Remove.
- Similarly, you can continue to remove more commands and once you are done, click OK.
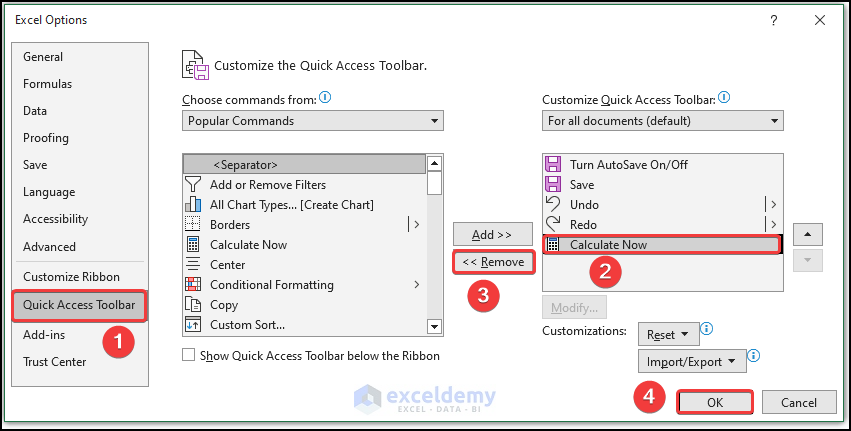
- Therefore, you will see that QAT is without the Calculate Now command.
4. Hiding Quick Access Toolbar
You can also customize the QAT by hiding it from the Excel window. Follow the steps below to do this.
📌 Steps:
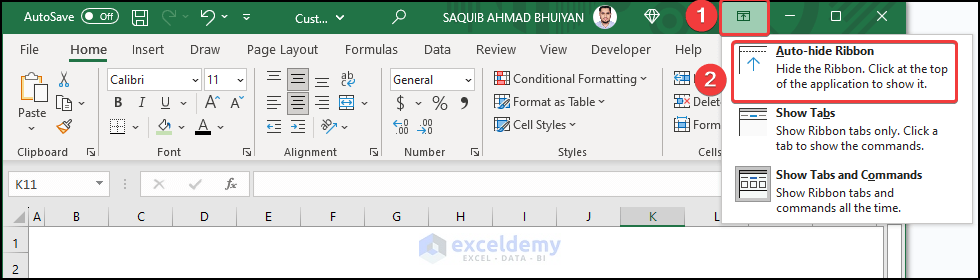
- Initially, click on the Ribbon Display Options icon.
- As a result, the below menu appears. Now click on the Auto-hide Ribbon option to hide the Excel Ribbon completely.
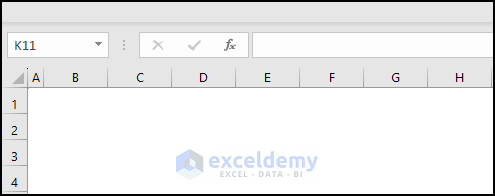
- Consequently, you will see that the Ribbon is hidden from the Excel window as shown in the below screenshot.
- You can display the Excel Ribbon by clicking on the three dots located in the top right corner of the Excel window (next to Ribbon Display Options). Or you can press the Alt key from the keyboard to go to any tabs.
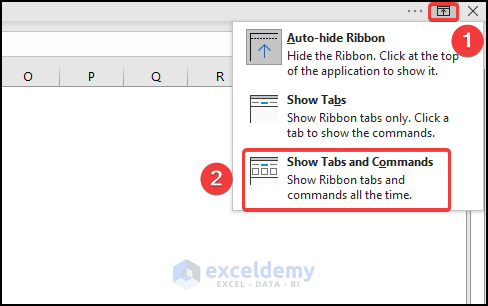
- You can again show the Excel Ribbon by clicking on the Ribbon Display Options and choosing any of the options shown below.
5. Changing Order of Commands
There is the option to customize the order of commands in the QAT if you need it. See the steps below.
📌 Steps:
- First, click the drop-down arrow and then choose More Commands.
- Therefore, the Excel Options window will appear.
- Now, select a command that you want to re-order and use the up-down arrow on the right.
- Next, once you are happy with the order, click OK.

- Therefore, you will get the following output.
6. Grouping Commands in Quick Access Toolbar
It may be a good idea to customize the QAT by grouping similar commands together. Let us see how we can do this.
📌 Steps:
- First, click the drop-down arrow and then choose More Commands.
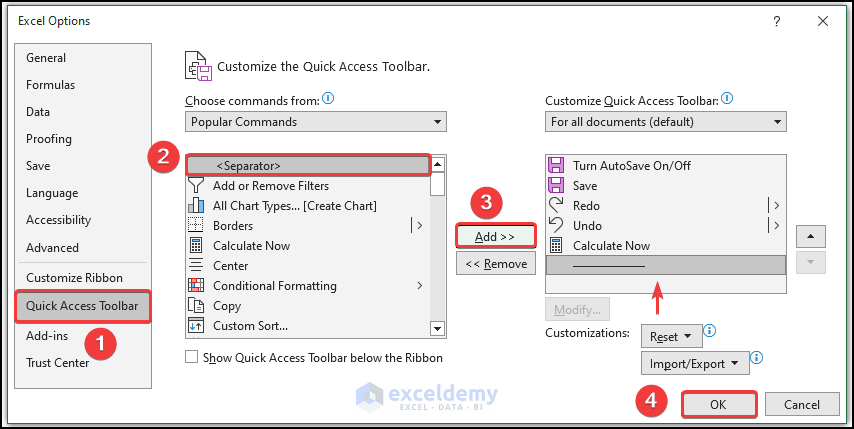
- Therefore, the Excel Options window will appear.
- Next, select <Separator> from the list of commands and click Add.
- As a result, all the commands that are above the Separator Line will now form a group.
- Finally, once you are done with grouping click OK.
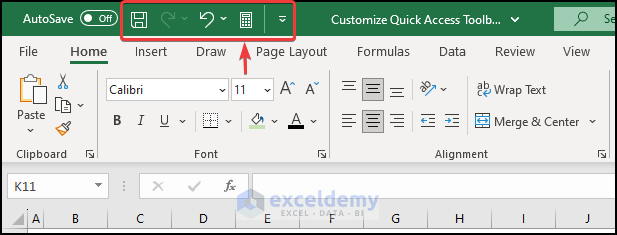
- Therefore, you will get the following output.
7. Add Macros to the Quick Access Toolbar in Excel
Here, we will show you how to add a macro to QAT using the Customize Quick Access Toolbar in Excel.
📌 Steps:
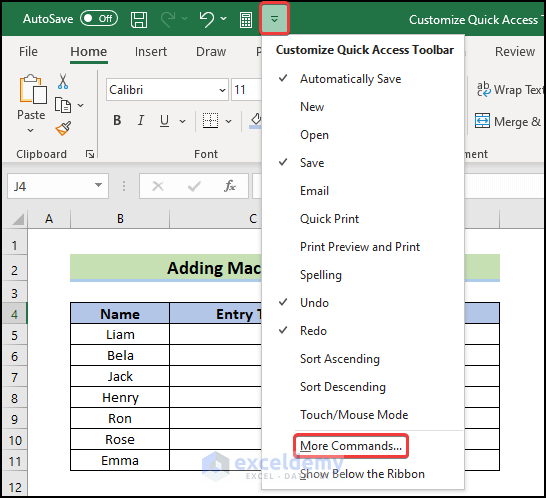
- First, click on the Customize Quick Access Toolbar drop-down button.
- Next, click on More Commands.
- Now, the Excel Options box will appear.
- After that, select Macros from the drop-down list on the left.
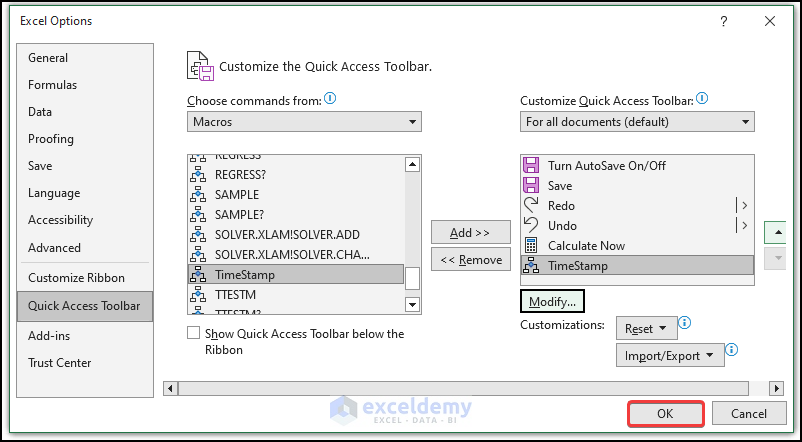
- Next, select your macro and click the Add button. Here, we will select the TimeStamp macro.
- Now, to change the icon or displayed text, click the Modify button.

- Next, the Modify Button box will appear.
- Then, type a name as Display name. Here, we will type Timestamp.
- After that, select any Symbol.
- Finally, click on OK.

- Then, click on OK.
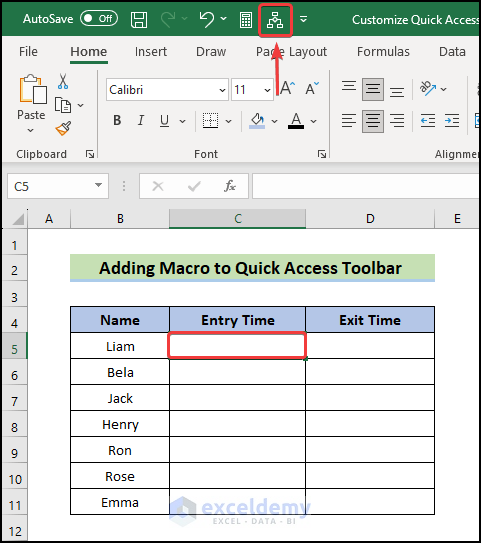
- After that, select the cell where you want to insert the current time.
- Next, click on TimeStamp to run the macro from your Quick Access Toolbar.
- Finally, the macro will run using the Quick Access Toolbox.
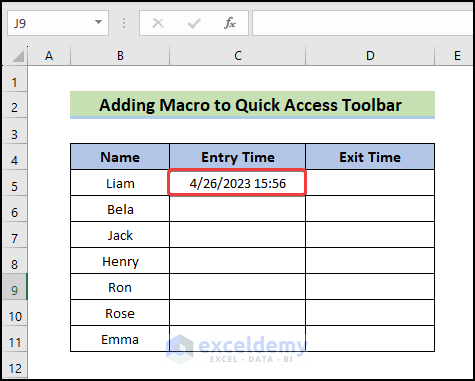
- Similarly, you can add all the other values in the dataset.

8. Customize the Quick Access Toolbar for the Current Workbook Only
If you want to customize the QAT for the current Excel workbook only, then this method can help you do that. Follow the steps below to see how.
📌 Steps:
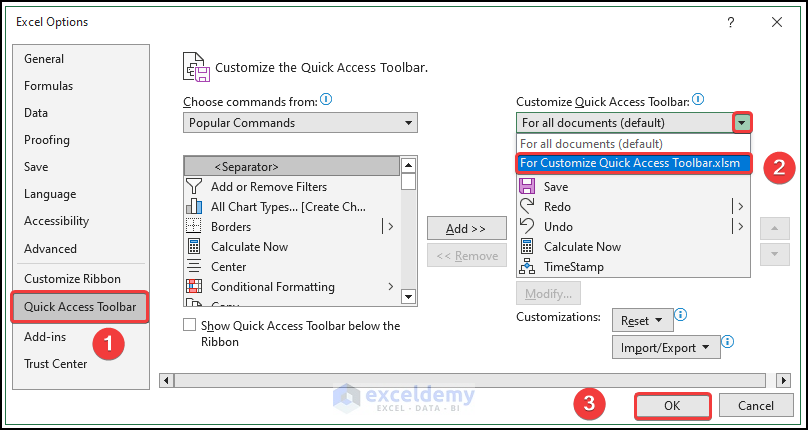
- First, click the drop-down arrow and then choose More Commands.
- Therefore, the Excel Options window will appear.
- Then, from the drop-down, select the current workbook to apply the commands.
- Finally, click OK to confirm.
Reset Quick Access Toolbar to Default Settings in Excel
If you want to remove all of your adjustments and return the QAT to its original configuration, you may reset it as follows:
📌 Steps:
- First, click the drop-down arrow and then choose More Commands.
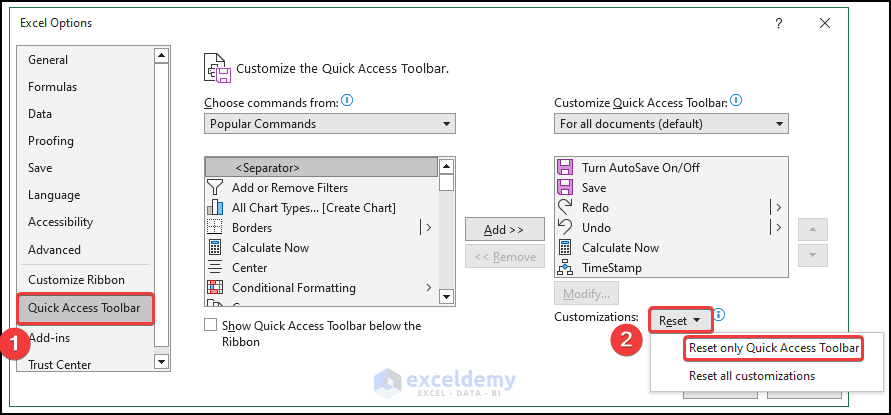
- Therefore, the Excel Options window will appear.
- Next, select the Reset button, and then choose Reset only Quick Access Toolbar.
Export and Import a Custom Quick Access Toolbar in Excel
If you want to export or import a custom QAT in Excel, you have to follow the following steps.
📌 Steps:
- First, click the drop-down arrow and then choose More Commands.
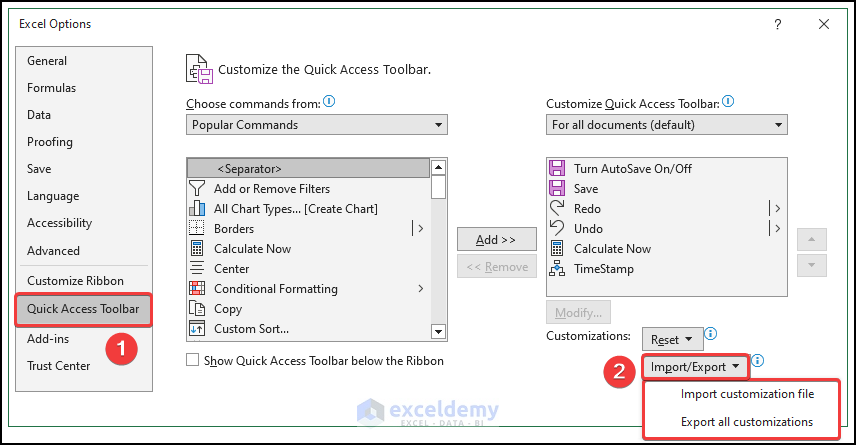
- Therefore, the Excel Options window will appear.
- To export a QAT, you need to select Import/Export, then choose Export all customizations, and finally save the customization file to another folder.
- To import a QAT, you need to select Import/Export, choose Import customization file, and then browse for the customization file that you saved previously.
Keyboard Shortcuts for Quick Access Toolbar
In addition, you can use the QATr’s buttons by using a keyboard shortcut. Excel displays all of the keyboard shortcuts for the QAT when you hit ALT.
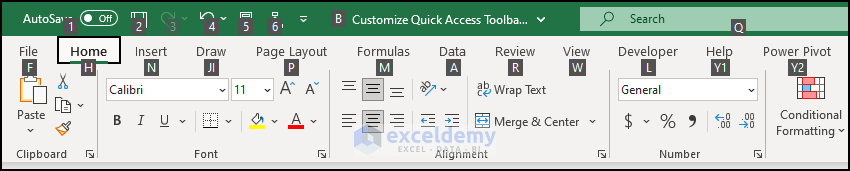
The QAT commands assign numbers to shortcut keys, as seen in the screenshot above.
Excel Quick Access Toolbar Missing
Sometimes the Quick Access Toolbar might be missing from the Excel window. There can be many reasons for this. But below, we will show you one of the most common ways to bring the missing QAT back.
- To begin with, right-click on any of the tabs and select the Show Quick Access Toolbar.
- Consequently, this should bring the missing QAT above the ribbon as in the image below.
Frequently Asked Questions
1. What is a Quick Access Toolbar in Excel?
One-click access to frequently used operations like Save, Undo, Redo, and Print is made possible via Excel’s Quick Access Toolbar, a resizable toolbar. It is placed above the Ribbon by default, but you can relocate it there if you’d rather.
By adding your commonly used commands or buttons to the Quick Access Toolbar, you may personalize it. You have two options for adding commands to the Quick Access Toolbar: either right-click the command and choose “Add to Quick Access Toolbar” or click the dropdown arrow at the end of the toolbar and choose “More Commands.” You may then select the commands you want to add to the toolbar from there.
You may save time and enhance the Quick Access Toolbar by customizing it.
2. How do I change the icon and name of a custom command in the Quick Access Toolbar in Excel?
To change the icon and name of a custom command in the Quick Access Toolbar in Excel, right-click on the command in the toolbar and select “Modify Button Image” or “Modify Button Text.”
3. How do I restore the default settings of the Quick Access Toolbar in Excel?
To restore the default settings of the Quick Access Toolbar in Excel, click on the dropdown arrow at the end of the toolbar and select “Customize Quick Access Toolbar.” Then, select “Reset” at the bottom of the window.
4. Is it possible to have different Quick Access Toolbars for different workbooks in Excel?
Yes, it is possible to have different Quick Access Toolbars for different workbooks in Excel. To do this, you can customize the toolbar for each workbook separately.
Things to Remember
There is no maximum limit for adding commands to your Quick Access Toolbar. But, depending on the size of your screen you may not be able to see all of them at the same time.
Download Practice Workbook
Download this practice workbook to exercise while you are reading this article.
Conclusion
That’s the end of today’s session. I strongly believe that from now you may be able to customize the Quick Access Toolbar in Excel. You will be able to add or remove commands, move the toolbar, make custom buttons, alter the icon and name of commands, reset the toolbar, and share personalized toolbars with others. If you have any questions please, let me know in the comment section below.
Customize Quick Access Toolbar: Knowledge Hub
<< Go Back to Quick Access Toolbar in Excel | Excel Parts | Learn Excel

